Different strokes
Do-it-yourself decorative painting adds interest to surfaces
Decorative painting is a fun and creative way to bring unique design elements into a room. Decorative painting produces surprising results that add depth, character, whimsy or drama.
Begin by preparing the surface of the wall, patching and smoothing holes or cracks. Clear away cobwebs, dust and grime. Finally, roll on a fresh coat of paint as a base coat for any decorative technique.
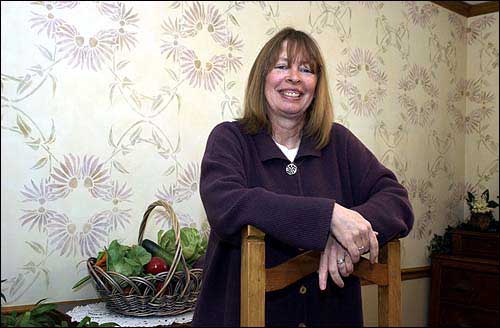
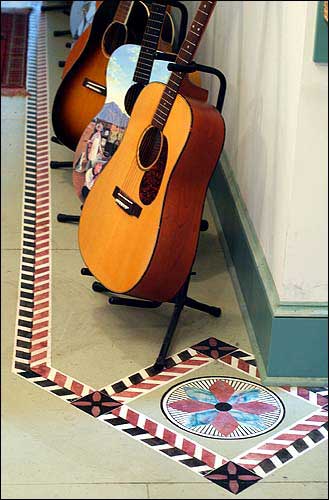
Nancy Ness, a decorative painter, created the wall behind her using a stencil pattern. Ness suggests starting with easier techniques such as sponge painting, which adds a textured look to walls and other surfaces. Ness also created the accent painting, below right, on the floor at Mass Street Music, 1347 Mass.
Nancy Ness, architectural artist and muralist at Ness Design Studios of Baldwin, suggests using a latex eggshell paint in a light color for the base coat.
“It’s one step up from flat paint,” she said. “It gives you a little bit of slide on the wall and it cleans up easily.”
Once the surface has a fresh coat of paint, the fun part begins. Decorative painting includes a range of techniques with differing degrees of difficulty and results.
“About the easiest technique is sponge painting,” Ness said.
With this technique, paint is applied over the base coat using a sponge. Ness suggests using a natural sea sponge because it has more interesting irregularities than the uniform texture of commercial sponges. Natural sea sponges can be found in hobby, import and paint stores. If using a commercial sponge, thicker is better.
Pour the paint into an old pie plate and dip the sponge in it. Dab the sponge on the wall. Continue to sponge the entire surface of the wall, renewing the paint on the sponge as needed.
“Wear gloves or be willing to have paint on your hands,” Ness said, noting that loose-fitting latex gloves are ideal.
From rags to rich color
Cheesecloth a lightweight, open-weave cotton fabric is used for similar painting techniques.
“Cheesecloth is a little harder to maneuver and gives you a little finer surface,” Ness said.
One cheesecloth technique is called “ragging on.”
“Crinkle the cheesecloth up and twist it like you are wringing out a washcloth,” she said. Then roll the cloth in a pan of paint and roll it on the wall.
“The hardest spots are corners and around the top,” she said.
The best way to paint these hard-to-reach spots is to wrap a piece of cheesecloth around a finger or two and start dabbing.
Another cheesecloth technique is called “ragging off.” With this process a latex glaze is applied over the base coat. Cheesecloth is pressed into the glaze, removing parts of it. Beautiful marks appear as the glaze is “ragged off.”
Dragging or stris a two-person project. One person rolls on an alkyd glaze an oil-based glaze that contains a drying agent. It is more transparent than a latex glaze and can be tinted.
“Choose a shade deeper than you think you want it to be,” she said. “The second person uses a house-painting brush with a wide, stiff bristle and brushes through the glaze.”
The brush strokes swiped vertically through the glaze produce a dramatic effect. Don’t worry if the strokes aren’t straight.
“That’s part of the fun in creating the marks,” she said. “It can be very effective, very pretty.”
The technique works best when done in a fluid motion.
“Do one wall at a time and do it without distraction,” she said. “Keep the wet line moving across the wall. If you stop and come back it will be really obvious where you stopped and started.”
Don’t forget the fun
A technique with immediate rewards is stenciling, which uses a plastic cutout of a particular design.
Ness offered an insider’s tip: “Turn your stencil upside down on a newspaper and spray it with spray-on adhesive.”
After letting it sit for 30 seconds, tap it gently to the wall, sticky side down. Then begin stenciling.
“That’s where people make their mistakes,” Ness said. “Stencils are really beautiful when you don’t use a lot of paint. It’s almost a dry brush.”
When stenciling, use acrylic paint found at art supply stores. Brush from the edge into the center, using a variety of colors.
“Move that paint around,” she said. “Don’t be afraid to play with the colors. You always have fun when you stencil.”
Ness warns against tackling the challenging painting techniques of marbling and wood grain without experience. Practice on sample boards first to build confidence.
Whatever the technique, choosing color can be tricky. Ness suggests using colors in related shades.
“Get strips of paint samples and pick two or three colors that are a few steps apart,” she said.
Her last piece of advice is to start with a small room, such as a walk-in closet, laundry room, bathroom or small bedroom “something that will be a weekend project.”
Otherwise, “you’ll end up really frustrated. The whole idea is it’s supposed to be fun.”
Carol Boncella is education coordinator at Lawrence Memorial Hospital and home and garden writer for the Journal-World.
Home and Garden
Flower gardens endure hot, dry summers better if you choose these plants
Debunking common garden hacks, quick fixes and myths

Douglas County Master Gardeners invites public to annual native plant sale
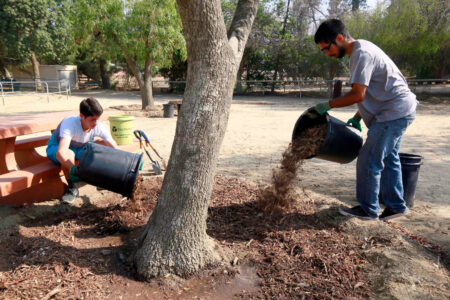
How to mulch your garden beds without harming plants