Behind the Lens: Put together your own panoramic image

This panorama photograph started with at least six vertical, wide-angle shots using the southeast corner of Seventh and Mass. streets as a centerpoint. The individual shots were then stitched together in a computer software program, in this case Photoshop's Photomerge.

This panorama photograph started with at least six vertical, wide-angle shots using the southeast corner of Seventh and Mass. streets as a centerpoint. The individual shots were then stitched together in a computer software program, in this case Photoshop's Photomerge.
Sometimes wide-angle lenses can’t capture the magnitude of a scene you want to photograph. No matter how you frame the subject, you just can’t get it all on your camera. A fun option is to create panorama images. Photographers started piecing together multiple images into wider images not long after the introduction of the Daguerreotype. Panoramic cameras were around in the late 1800s, and the pano look remains popular today. Recently, manufacturers incorporated a pano switch on some cameras to make you believe you are capturing a wider image. You aren’t. This mode has a cropping mask that just frames a shallower portion of your scene. It actually eliminates information from the top and bottom of your image. For a truer experience in panorama photography, without buying special panorama cameras, here’s a method I use. This technique can be used whether you are going to manually tape prints together or use a computer software program to merge the images.
• I locate a position that will act as a centerpoint for my photograph.
• I use a wide-angle lens, the wider the better, turn my camera vertically and then manually set my exposure and focus. If you use auto, variations in exposure and focus may be noticeable from frame to frame. You want to shoot vertically because you’ll need the added information at top and bottom when you go to create your final pano. You can always add to the image horizontally by taking more photos at left or right.
• Working from left to right (right to left works, too!), I shoot my first frame to establish the start of the panorama. Keeping the camera raised and still in position, I move the camera to the right for each additional shot, overlapping each frame by at least a third. I continue with this progression, through my field of vision, until I have covered 180 degrees more or less.
You can do this technique with or without a tripod. A tripod will make it easier to stay level and rotate through your shots.
To piece together your panorama, one route is to get prints made and assemble by taping overlapping images together. Matted and framed, this method can look artful and unique. With digital images the process has been simplified. Software programs can automate “image stitching” by combining your images into a blended panorama. The images will be so well-merged that you’ll have a hard time finding overlapping points.
At the Journal-World we use Adobe Photoshop’s Photomerge program and PYTGui. There are dozens of others to consider. A nice list is available at Wikipedia. But before you spend money on one you might want to check the CD that came with your camera. PhotoStitch, a highly regarded program, comes with most Canon cameras. Other manufacturers may have their own version. So the next time you find yourself in a tight spot or facing a wide vista your camera can’t capture, take multiple shots across your field of view and start stitching.
Arts and Entertainment

Watkins Museum to open special exhibit detailing how Douglas County celebrated America’s Bicentennial
Go, See, Do: Kaw River Roots Festival, markets and more

Soccer gear honoring Lawrence history’s all-star team is now on sale as part of city’s public art exhibition
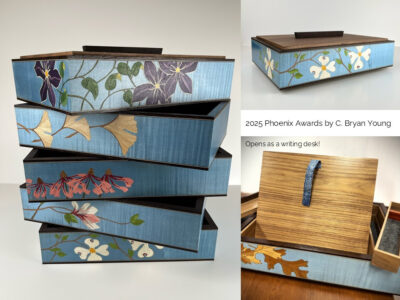
Nominations, call for artists open for Lawrence’s 2026 Phoenix Awards
Go, See, Do: ‘Addams Family’, PRIDE parade and a host of library events among offerings