Sow on and sow forth
Starting plants from seeds an affordable way to fill garden with abundant blooms
There is something so simplistic about starting a plant from seed. Perhaps it’s that the gardener is, in essence, the mother of the plant, nurturing the tiny seed, coddling it with the right temperature and moisture.
Extreme satisfaction is attained watching something grow from its very beginning form, but there are more tangible benefits as well. Starting plants from seeds is a great way to save money. Consider that most packets of seeds have multiple plants in them and are generally less than a couple of dollars versus buying an established plant for triple that price.
Seeds are also a great way to get exactly what you want in your garden. If the nursery doesn’t have a plant you seek, try starting it from seed yourself. It’s still too cold to be planting outdoors, but starting seeds inside with the comforts of heaters and artificial lighting will scratch a gardener’s midwinter itch. Late February and early March is the time to begin germinating seedlings.
Here’s what you’ll need, according to gardenguides.com:
- A sunny window, or you may consider investing in some florescent bulbs to provide light.
- Containers that are clean and have good drainage. A clever solution is using an egg carton with holes punched in the bottoms.
- Seeds. You’ll get the best results with seeds bought fresh.
- A growing medium, which is generally best bought commercially to insure it is free of weeds.
Sowing seeds
Fill pots or flats to within 1/4 inch of the top with potting mixture and level the surface. Water the soil and allow it to drain before sowing seeds. Make a hole for each seed with your finger or a pencil end. Most seeds should be planted four times as deep as the seed is wide. If the seeds are fine, cover them with a very thin layer of soil.
At Howard Pine’s Garden Center and Greenhouses, 1320 N. Third St., Peter Avila and Anita Vail are the official seed sowers. According to Avila, mixing sand with minuscule seeds makes the process much easier.
“Petunia seeds are tiny, and we have an entire greenhouse devoted to petunias, which we started every one by seed,” Avila says. “By mixing them with sand, it is much easier to keep track of the petite seeds.”
Moisture, humidity
The germinating medium should be kept evenly moist rather than soaking wet. Too much moisture and the seeds will rot. A gardener may try using a misting device and covering the seeds with plastic bags to keep the humidity in. This reduces the amount of time you’ll spend watering. At Howard Pine’s, employees water from below to keep the water directly off the plants.
Light
Read the directions on your seed packet to know what that particular seed’s light requirements are. Some seeds require no light to germinate, while others thrive from it. However, once seeds have sprouted, all seedlings need light. You may even choose to supplement the light with some florescent bulbs.
Avila says heat is even more important than light.
“The temperature shouldn’t vacillate too much,” she says. “We even use heated rubber mats to keep our seedlings happy.”
Seedling care
Small pots and flats dry out quickly, so be vigilant about checking their dampness. If your seedlings are in a windowsill, be sure to turn them often to encourage straight stem growth.
According to gardenguides.com, the first two leaves on a seedling aren’t true leaves but food storage cells called cotyledons. Once the first true leaves have developed, it is time to begin fertilizing.
Avila suggests moving germinated seeds.
“Once the seeds sprout, we pull them off the heated mat because they start to get leggy — and you don’t want your seeds to get leggy,” she says.
Hardening off
One week before transplanting your seedlings outdoors, start to harden them off. This process acclimates the tender plants. The idea is to expose the plants gradually to wind, cool temperatures and harsh sun. Move the plants to a shady outdoor area at first, and bring them indoors at night. Each day, move them out into the sun for a few more hours than the day before. Continue to water your plants well and monitor them for insects.
Transplanting
Be sure there’s no more frost in the forecast before putting your new plants in the ground; they won’t survive the bitter cold.
When you’re ready, thoroughly water the ground and the seedlings before transplanting them; this will help prevent transplant shock. Aim to transplant on a cloudy day so the strong sun won’t wilt the seedlings.
Dig a hole about twice the size of the root ball and put the transplant into the hole so the root ball will be covered by 1/4 inch of soil. Press the soil firmly around the plant, leaving a slight indentation where water will become trapped. Water the new plants immediately after transplanting and every day after that for the first week.
Howard Pine’s started planting its seeds for herbs and perennials back on Dec. 1. Employees are almost finished transplanting all of those plants.
Appropriate seeds
So what are some seeds that grow well in our area?
“For the novice seed grower … marigolds, nasturtiums, alyssum, cosmos and zinnias all have a very high rate of success,” Avila says. “As far as perennials, the hollyhocks, asclepias, catananche, centranthus ruber and delphiniums are all hardy seeds that grow nicely. And, lastly, the easiest vegetables to start from seeds would be the tomatoes and peppers. These plants are a great place to start.”
So, grab an old egg carton and try sprouting a few plants from seed. It will be entertaining to watch them grow. It’s also a fun activity for kids and should have very little impact on your pocketbook.
Sources: gardenguides.com, humeseeds.com
Home and Garden
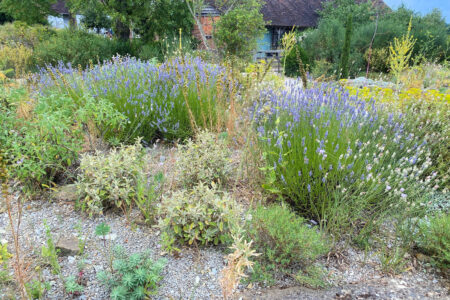
Gravel gardens can cut wildfire and heat risks
DIY projects can save money and build confidence
When something in the house stops working or needs to be replaced, the first impulse of many people is to call a ...

When looking to add pop to your home for the right price, look to molding

Keep these tips in mind when establishing a home renovation budget
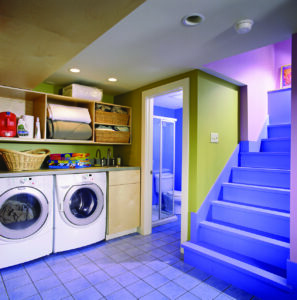
A few thoughtful additions can greatly improve efficiency in laundry rooms
You can use retirement savings for down payment on a house, but should you?
LOS ANGELES — Raiding retirement savings for a down payment on a home can be tempting, especially if you’ve ...