New irrigation systems save water and time
Nick Krug/Journal-World Photo.
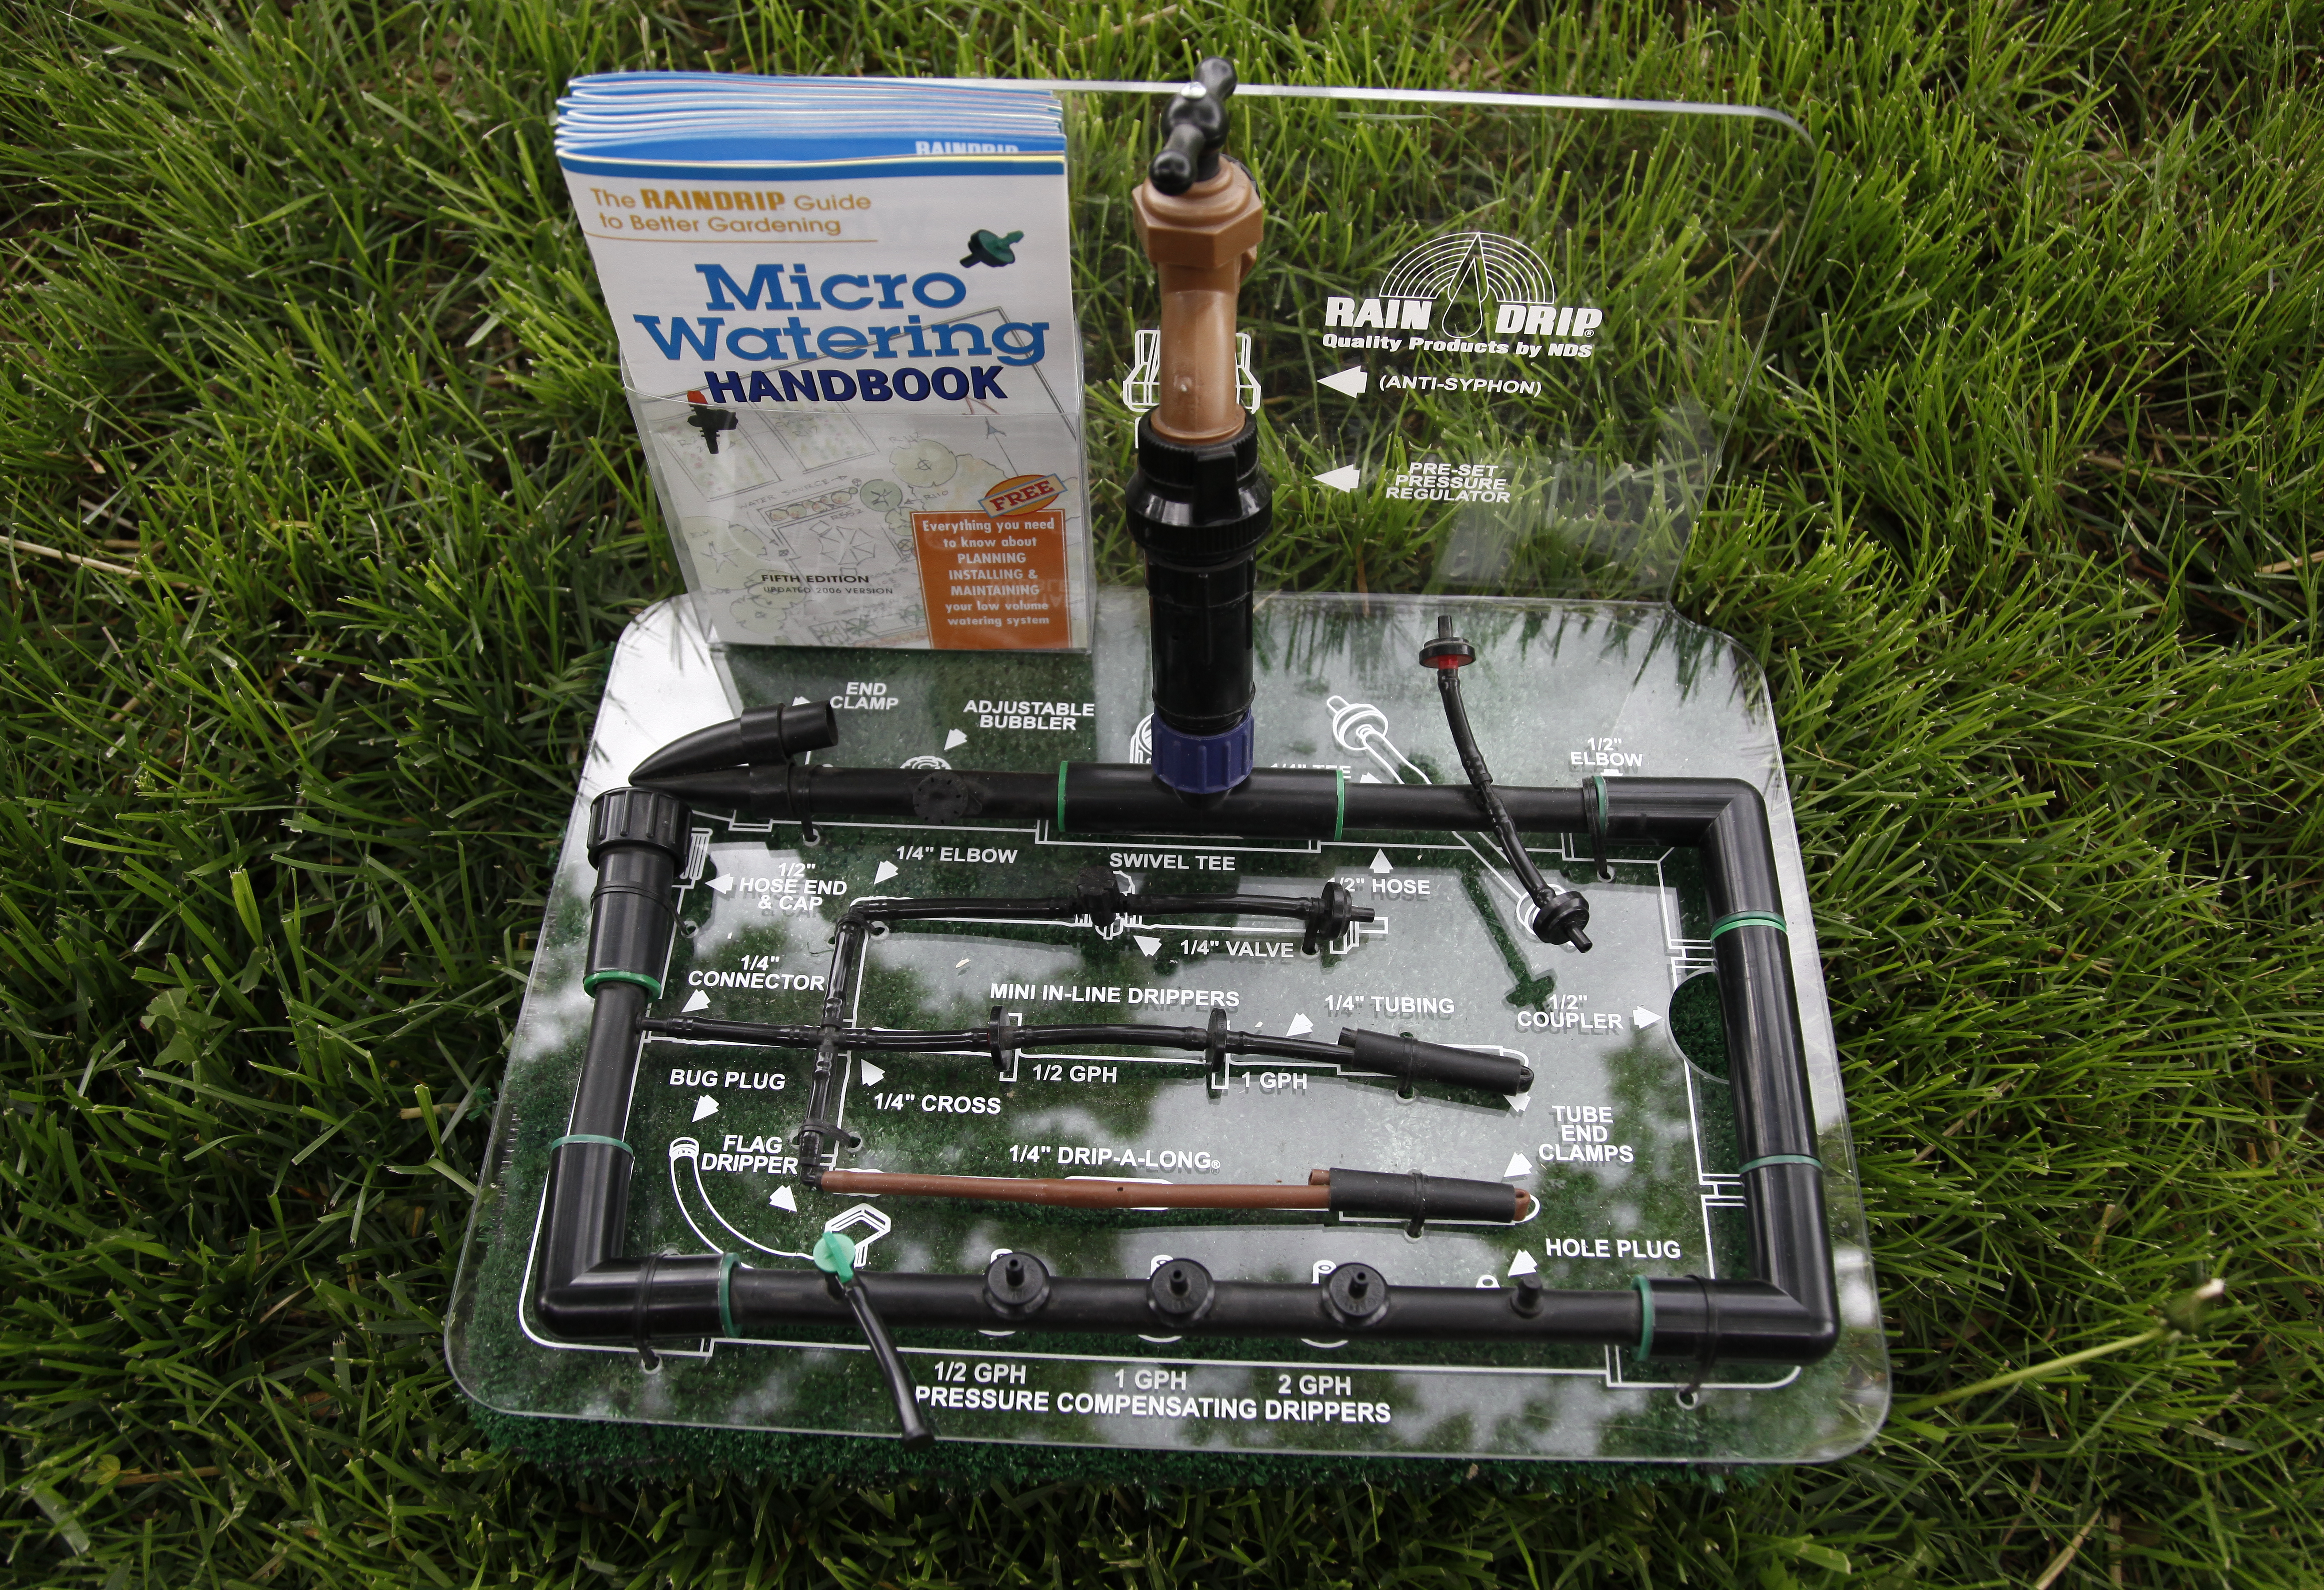
Installing a drip irrigation or micro-watering system is an easy way to save water, as well as time, while improving the overall health of your plants.
Step 1: Lay out a plan. It is best to start small and add to your irrigation system as time and money allow. Choose a few plants in one area that you want to water and draw up a plan for running irrigation lines to them.
Step 2: Lay out your new system. Before connecting anything, lay out all the pieces in the general area you plan to install them. Irrigation tubing is much easier to work with after it has set in the sun for an hour or so. Be sure to unroll it, as opposed to pulling it from the center of the coil as you lay it out.
Step 3: Assemble your lateral lines and drippers — the small parts — but do not attach them to the main irrigation line yet. Cut small tubing at a 15-degree angle to help when inserting fittings.
Step 4: Attach the main irrigation line to your water source.
Step 5: Working down the line from the water source, install each additional lateral line, sprinkler or dripper.
Step 6: Once you have all pieces assembled and attached, remove all end caps or clamps, as well as any sprinklers and jets. Turn the water on to flush out any dirt or debris that may have gotten in the line during the installation process.
Step 7: With the water still running, close off any open ends with the appropriate end clamps or caps.
Step 8: Turn the water off and reattach all of the sprinkler heads and jets.
Step 9: Turn the water back on, check for leaks or clogged devices. Make any necessary adjustments to ensure optimal water application. If desired, cover the main irrigation line and any lateral lines with up to 6 inches of mulch to keep them in place and protect them from garden implements.
Put away your tools, clean up your work area and set up an appropriate watering schedule to take full advantage of your new irrigation system.