Behind the Lens: Patience with ‘light painting’ creates special effects

A photo of the 1988 Kansas University men's basketball championship trophy was used for a Lawrence Journal-World special section earlier this year. Light
It’s a rare occasion when a photographer can take complete and total control of a lighting situation without some sort of interference. In early February, photographer Thad Allender and I decided that we wanted to try a method called “light painting” to photograph the 1988 NCAA championship trophy for the cover of a special section “A Title Turns 20” that the Lawrence Journal-World did on the 20-year anniversary of the ’88 win. Light painting simply entails setting a long exposure and deliberately using a light source (for our purposes, a flashlight) to illuminate a subject in a relatively dark environment. We chose to experiment with the effect because we wanted a photo that could potentially give off a nostalgic and dreamy sort of feel.
On the day of the shoot, Candace Dunback, curator of the Booth Family Hall of Athletics, and Rodney Fowler, a former KU safety and intern with the Hall, were gracious enough to assist us. Candace allowed us to use her office inside Allen Fieldhouse as a makeshift studio. Rodney, besides taking the time to remove the trophy and the net from the trophy case (no small task) volunteered his services to flip the room lights on and off at our request. The words were never spoken, but I also believe that he provided muscle for the KU Athletics Department to ensure that two Lawrence Journal-World photographers had no intention of accidentally selling the beloved trophy on eBay. After about 45 minutes of shooting, reviewing and more shooting, Thad, Rodney and I eventually gave the nod to a particular photo that we all agreed upon.
If you’d like to try it out, here are the recommended steps to take and the items needed: household flashlight, tripod, camera (preferably a digital SLR) and some sort of subject matter. Note: Still lifes work best as subjects. You can obviously photograph a person in this manner, but I recommend a very patient and stationary bowl of fruit to use while practicing your craft.
Step one: Choose a clear space free of clutter in which you plan to shoot the photograph (Remove everything such as toys, books or your collection of broken glass from the floor to avoid injury.) Make sure it is or can easily be converted to a light-free environment. Note: You can cover windows with dark sheets or dark construction paper.
Step two: Arrange your subject (the still life) in whichever manner you prefer.
Step three: Place your camera on a tripod, compose the frame and focus on your subject with the lights on. Note: It is helpful to position the camera and tripod within arms reach of a light switch.
Step four: After you have prefocused on the subject, set your exposure with a shutter speed of about 30 seconds, aperture F 8 and an ISO of 200 for starters. Make sure the autofocus function and the flash are both turned off. Note: Most household flashlights give off a warm, reddish sort of light. If you wish to keep this warm effect, set your white balance to the daylight setting. If not, set your white balance to the incandescent bulb setting.
Step five: Without hurting yourself and with your flashlight at hand, flip off the light switch. Carefully press the shutter on your camera to avoid shaking the tripod. Turn on the flashlight and begin painting the scene with light from the sides of your subject. Note: It is helpful to direct the light at about a 45-degree angle toward the subject and away from the camera to prevent glare and lens flare.
Step six: After you’ve shot your first frame, flip the lights on and review the photo on the back of your camera. If the photo appears too dark, you can open up your aperture to F 5 or so, or on the next attempt, paint the scene with your flashlight closer to the subject. If the result is too bright, stand farther back from the subject while painting or set a higher aperture, maybe F 11. Note: The closer the light source, the more concentrated it will appear in your photo. The farther back the light source, the more diffused the light will be.
Step seven: Continue more attempts until you get a result that you like. Pay attention to how much time you spend painting certain areas of the subject and how the results look upon review. Note: The more time spent on one particular section, the brighter that part of the frame will appear.
Arts and Entertainment

Photos: Lawrence begins World Cup festivities with downtown block party
Watkins Museum to open special exhibit detailing how Douglas County celebrated America’s Bicentennial

Go, See, Do: Kaw River Roots Festival, markets and more

Soccer gear honoring Lawrence history’s all-star team is now on sale as part of city’s public art exhibition
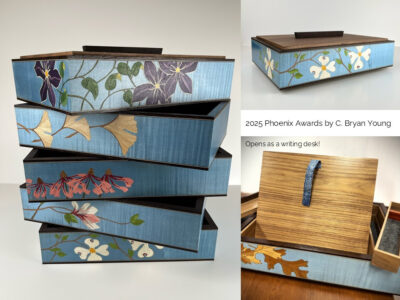
Nominations, call for artists open for Lawrence’s 2026 Phoenix Awards