Sweet dreams
Custom candies make great Valentine's Day gifts

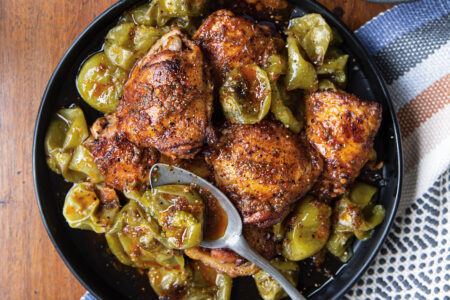
Making candy for your sweetheart this Valentine's Day might be easier than you think - and it might be a personalized alternative to store-bought chocolates. Pictured are a variety of chocolates made by Lawrence resident Donna Miller.

Marlene LeInmiller has several tips for making home-made chocolates, like these peanut butter-filled chocolates.

Marlene Leinmiller has several tips for making homemade chocolates. Among them, she recommends using high-quality chocolate made from cocoa beans rather than powder.
Sweet Tips
Here are some specific helpful hints for candy making from Marlene Leinmiller of George’s Hobby House, 1411 W. 23rd St., Suite B.
Ingredients
Chocolate: Only use candy-making chocolate. Do not substitute chocolate chips or baking chocolate as you will have to add paraffin wax to it, therefore altering the quality of your candy.
Colors, flavors: To change the color of the filling, it is necessary to use powdered food coloring, not liquid. To add flavors (peppermint, orange, etc.) use oils, not liquid flavorings.
Melting
In the microwave: Put the chocolate in a glass bowl. Melt it on the lowest setting for 15 seconds at a time, stirring in between the 15-second intervals. Don’t get it too hot.
Molding
To avoid air bubbles: After you have filled each cavity with the melted chocolate, gently tap the mold on the table to eliminate any air bubbles that may have been trapped between the candy and the mold.
Freezing the molds: Time will vary depending on how big a piece of candy you are making. Don’t leave in the fridge too long – you want to chill it, not freeze it.
Storage
Short-term storage: Candy can be kept at room temperature in an airtight container for one month.
A box of chocolates? Red roses? Jewelry?
All of the above?
When Valentine’s Day rolls around, lovers have plenty of choices, from the perfect (and perfectly cheap) card to sparklers weighing in at a couple of carats.
But what if you want to make something for your special someone instead of just making credit card payments in remembrance of what you bought? What if you want to create something for your sweetie straight from your heart?
You could make a card, but it might seem a bit bare by itself. You could grow your own flowers, but this time of year, you’re probably out of luck – unless the recipient would like a head of decorative cabbage.
But what about making your own chocolates? With the right tools and a little love, you can make professional-looking chocolates for your valentine, says Marlene Leinmiller.
Easier than it used to be
Leinmiller has been making her own candies since 1976 and teaching the art in classes just as long at the store she owns with husband George, George’s Hobby House, 1411 W. 23rd St., Suite B. She says improvements in chocolate technology have made it easy for anyone to make professional-looking candies using molds and equipment found in any basic dorm room – a fridge and a microwave.
“They’re all so easy to mold. It used to be very difficult because the chocolate came in great big slabs – 10-pound slabs – and you had to break it off. It’s come a long way since then,” Leinmiller says. “Companies now do the little candy discs, so they’re easy to melt them in the microwave. You melt them for a few seconds, coat your mold. And if you have your filling made, you put it in and cover it with chocolate, pop it in the refrigerator for five minutes or so, and you’ve got it made. Pop it out, and you’re done.”
Everything from chocolate-covered cherries to chocolate peanut butter cups to mint patties can be made with this method. Does she like caramel? Try caramel cups. Does he like coconut? Mounds-like coconut-filled chocolate candies are easy to create as well.
And with a variety of types of chocolate – including milk and dark – and with a variety of shapes of molds to choose from, you can personalize your candy for your loved one.
Ins and outs of chocolate
Genny Hunsinger, of Lawrence, has created homemade candies since taking a two-day course taught decades ago by a man from the candy-coating company of choice for both women – The Candyman in Lathrop, Mo. Later, she gave her own candy-making demonstrations at the Douglas County Extension Office.
Hunsinger agrees that the newer advances in a type of chocolate – what Candyman calls a “summer coating” – make candy-making much easier than before.
“The reason this summer coating is so good is if it gets a little hard on you, all you have to do is toss it back on the heat – and it does get to where you can’t keep melting it over and over and over,” Hunsinger says. “Nestle’s chocolate bits or something, once it starts to get hard on you, you can’t do anything.”
Leinmiller says while the melt-ability is a definite plus, to create truly heart-shape-box worthy chocolates, the quality of the chocolate is of the most importance. Don’t use the cheap stuff unless you want your candies to look cheap.
“(You want) the high quality of chocolate made from the cocoa bean rather than powder. That’s what gives it a professional look,” Leinmiller says. “The one we particularly use is made from the heart of the bean, not the just cocoa.”
For those wanting to brave the world of candy-making just for Thursday’s holiday, or for year-round sweet treats, Leinmiller says the extra effort will be well worth it – worth much more than whatever you can pay for.
“It used to be if you didn’t know what else to do, you’d go buy a box of chocolates – they were inexpensive,” Leinmiller says. “But now if you make your own candy you’re giving something of yourself, and it’s fun to do.
“It’s satisfying that you can do it and give it somebody.”
Recipes
Each of these recipes are for the “centers” of the preferred candy. All recipes also require candy-making chocolate, molds and a brush to apply the chocolate. For tips on how to melt the chocolate and care for your candies, see box.
Chocolate-covered cherries
1/2 cup dry fondant
3 tablespoons Maraschino cherry juice
Melted candy-making chocolate
Mix together dry fondant and cherry juice to make the mixture that will be the fondant syrup in the middle of the candies. Make a chocolate shell in each cavity of the bon bon Apollo mold No. 101 or No. 585 with about 2/3 teaspoon of melted candy-making chocolate, and stroke upward with your brush until each bon bon mold is completely coated with chocolate. Spoon into each bon bon cavity 1/4 or 1/3 teaspoon of the fondant syrup. Place a drained maraschino cherry into each cavity. Spoon melted chocolate on top and spread around with a brush, being sure all the edges are sealed so finished candy will not leak. Do not tap the mold. Place in the freezer for 4 to 5 minutes to chill and then pop out. The chocolate-covered cherries may be eaten as soon as they return to room temperature, but they are most delicious when they are at least two to three days old.
– Recipe from Marlene Leinmiller
Mint patties
Redi-Fondant (or dry fondant/homemade fondant that has been prepared)
Drops of peppermint oil to taste
Melted candy-making chocolate
Mix together Redi-Fondant and peppermint oil to make the mixture that will be the “cream” inside your peppermint patties. Brush in a chocolate shell in each cavity of Apollo mold No. 468. Spoon into each cavity Redi-Fondant mixture. Spoon melted chocolate on top and spread around with a brush, being sure all the edges are sealed. Place in the freezer for 4 to 5 minutes to chill and then pop out.
– Recipe from Marlene Leinmiller
Peanut butter cups
1 18 ounce jar peanut butter (smooth or crunchy)
1 stick butter or margarine, melted
1 pound powdered sugar
2 teaspoons vanilla
Melted candy-making chocolate
Mix peanut butter and butter/margarine together with a spoon. Add powdered sugar and knead until smooth. Put melted chocolate into the Apollo peanut butter cup mold No. 233. Add a patty of the peanut butter mixture, then cover with more of the melted chocolate. Put into the freezer for about 4 minutes, then turn over and tap the finished candy onto a plate.
– Recipe from Marlene Leinmiller
Easy Buttercream Centers
3 ounces cream cheese
1/2 cup butter or margarine, softened
4 cups powdered sugar
1 1/2 teaspoons white vanilla
Beat the cream cheese and the butter/margarine together until smooth. Blend in powdered sugar and white vanilla. If necessary, chill for about an hour, or firm enough to handle. Roll into ball centers and place on a wax paper-covered cookie sheet and chill for 3 to 4 hours or overnight. Press into the centers of desired molds brushed in chocolate and cover with chocolate before sticking the molds in to the freezer until set. Tap out the finished candy onto a plate.
– Recipe from Genny Hunsinger
Cooked fondant
2 cups white sugar
2/3 cups water
2 tablespoons white syrup
1/2 teaspoon glycerin
1/8 teaspoon cream of tartar
May add flavoring or extract if desired
Cook all ingredients together over low heat until soft ball stage or 325 degrees on a candy thermometer. Keep crystals wiped down from sides of the pan with a cloth wrapped around a fork or a pastry brush. Pour immediately onto a lightly greased platter. When cool enough to hold a finger in for 1 minute, beat until creamy. Then knead with hands until proper consistency to roll into ball centers. This fondant can be used with the drained and dried Maraschino cherries to create from-scratch chocolate-covered cherries.
– Recipe from Genny Hunsinger
Peanut butter toffee (Butterfinger center)
1 cup peanut butter
1 cup sugar
1/3 cup corn syrup
1/3 cup water
Heat peanut butter over the lowest heat on an electric stove or in a double boiler on a gas stove. Cook syrup, sugar and water to 310 degrees (on a candy thermometer). Remove from heat. Add warm peanut butter and quickly stir until completely blended. Immediately pour onto a greased cookie sheet. Spread as thinly as possible. Score into pieces immediately. Can be either dipped in chocolate or used as the center for candy molded in Apollo mold #605, the candy bar mold.
– Recipe from Marlene Leinmiller
Food
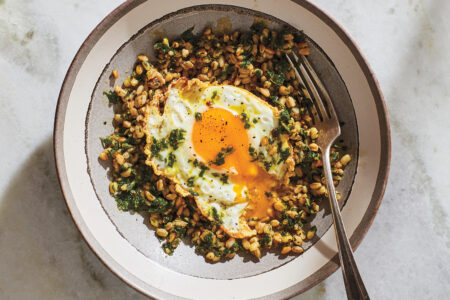
David Tamarkin’s recipe for Greens, Grains and Fried Egg works for any meal
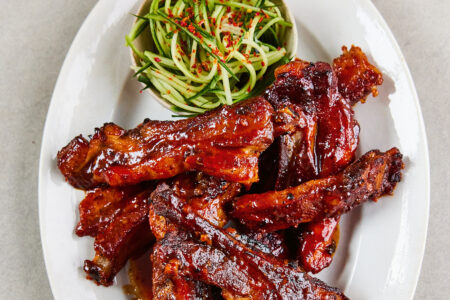
Slow-cooked, sticky-glazed pork ribs go with cucumber slaw in Sam Way’s recipe
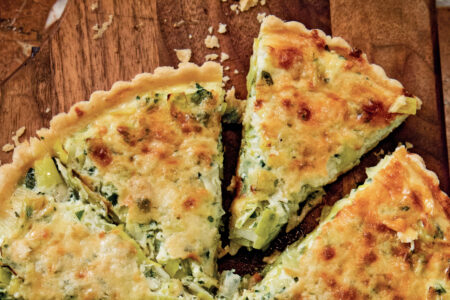
This quiche just might make you love leeks