Remnant Rehab: Make your own outdoor furniture covers
Last summer, I bought new patio furniture. To keep it good as new, I’m trying to protect it from the elements. I brought the chairs into the garage and came up with a plan to cover the table.
Pre-made furniture covers are pricey, but using two outdoor tablecloths and fishing weights, Katie Kritikos made one for less than 0.
Pre-made furniture covers are pricey, but using two outdoor tablecloths and fishing weights, I made one for less than $20.
These directions are what I did for my table, which is round. It’s 48 inches across and 29 inches high. The tablecloths I used were the two sizes available at Target, a 70-inch circle and a rectangle 60 inches by 84 inches. I used 1-inch seam allowances.
Supplies: Two outdoor tablecloths, waterproof on top with fuzzy backing; measuring tape; binder clips; string; marker or tailor’s chalk; sewing machine; thread; hand-sewing needle; embroidery floss (optional); drapery weights or fishing weights.
Instructions:
- Measure table across, around the outside (its circumference) and its height. Divide width of table in half and add 1 inch for seam allowance. For me, this measurement was 25 inches. Cut a piece of string to this length.
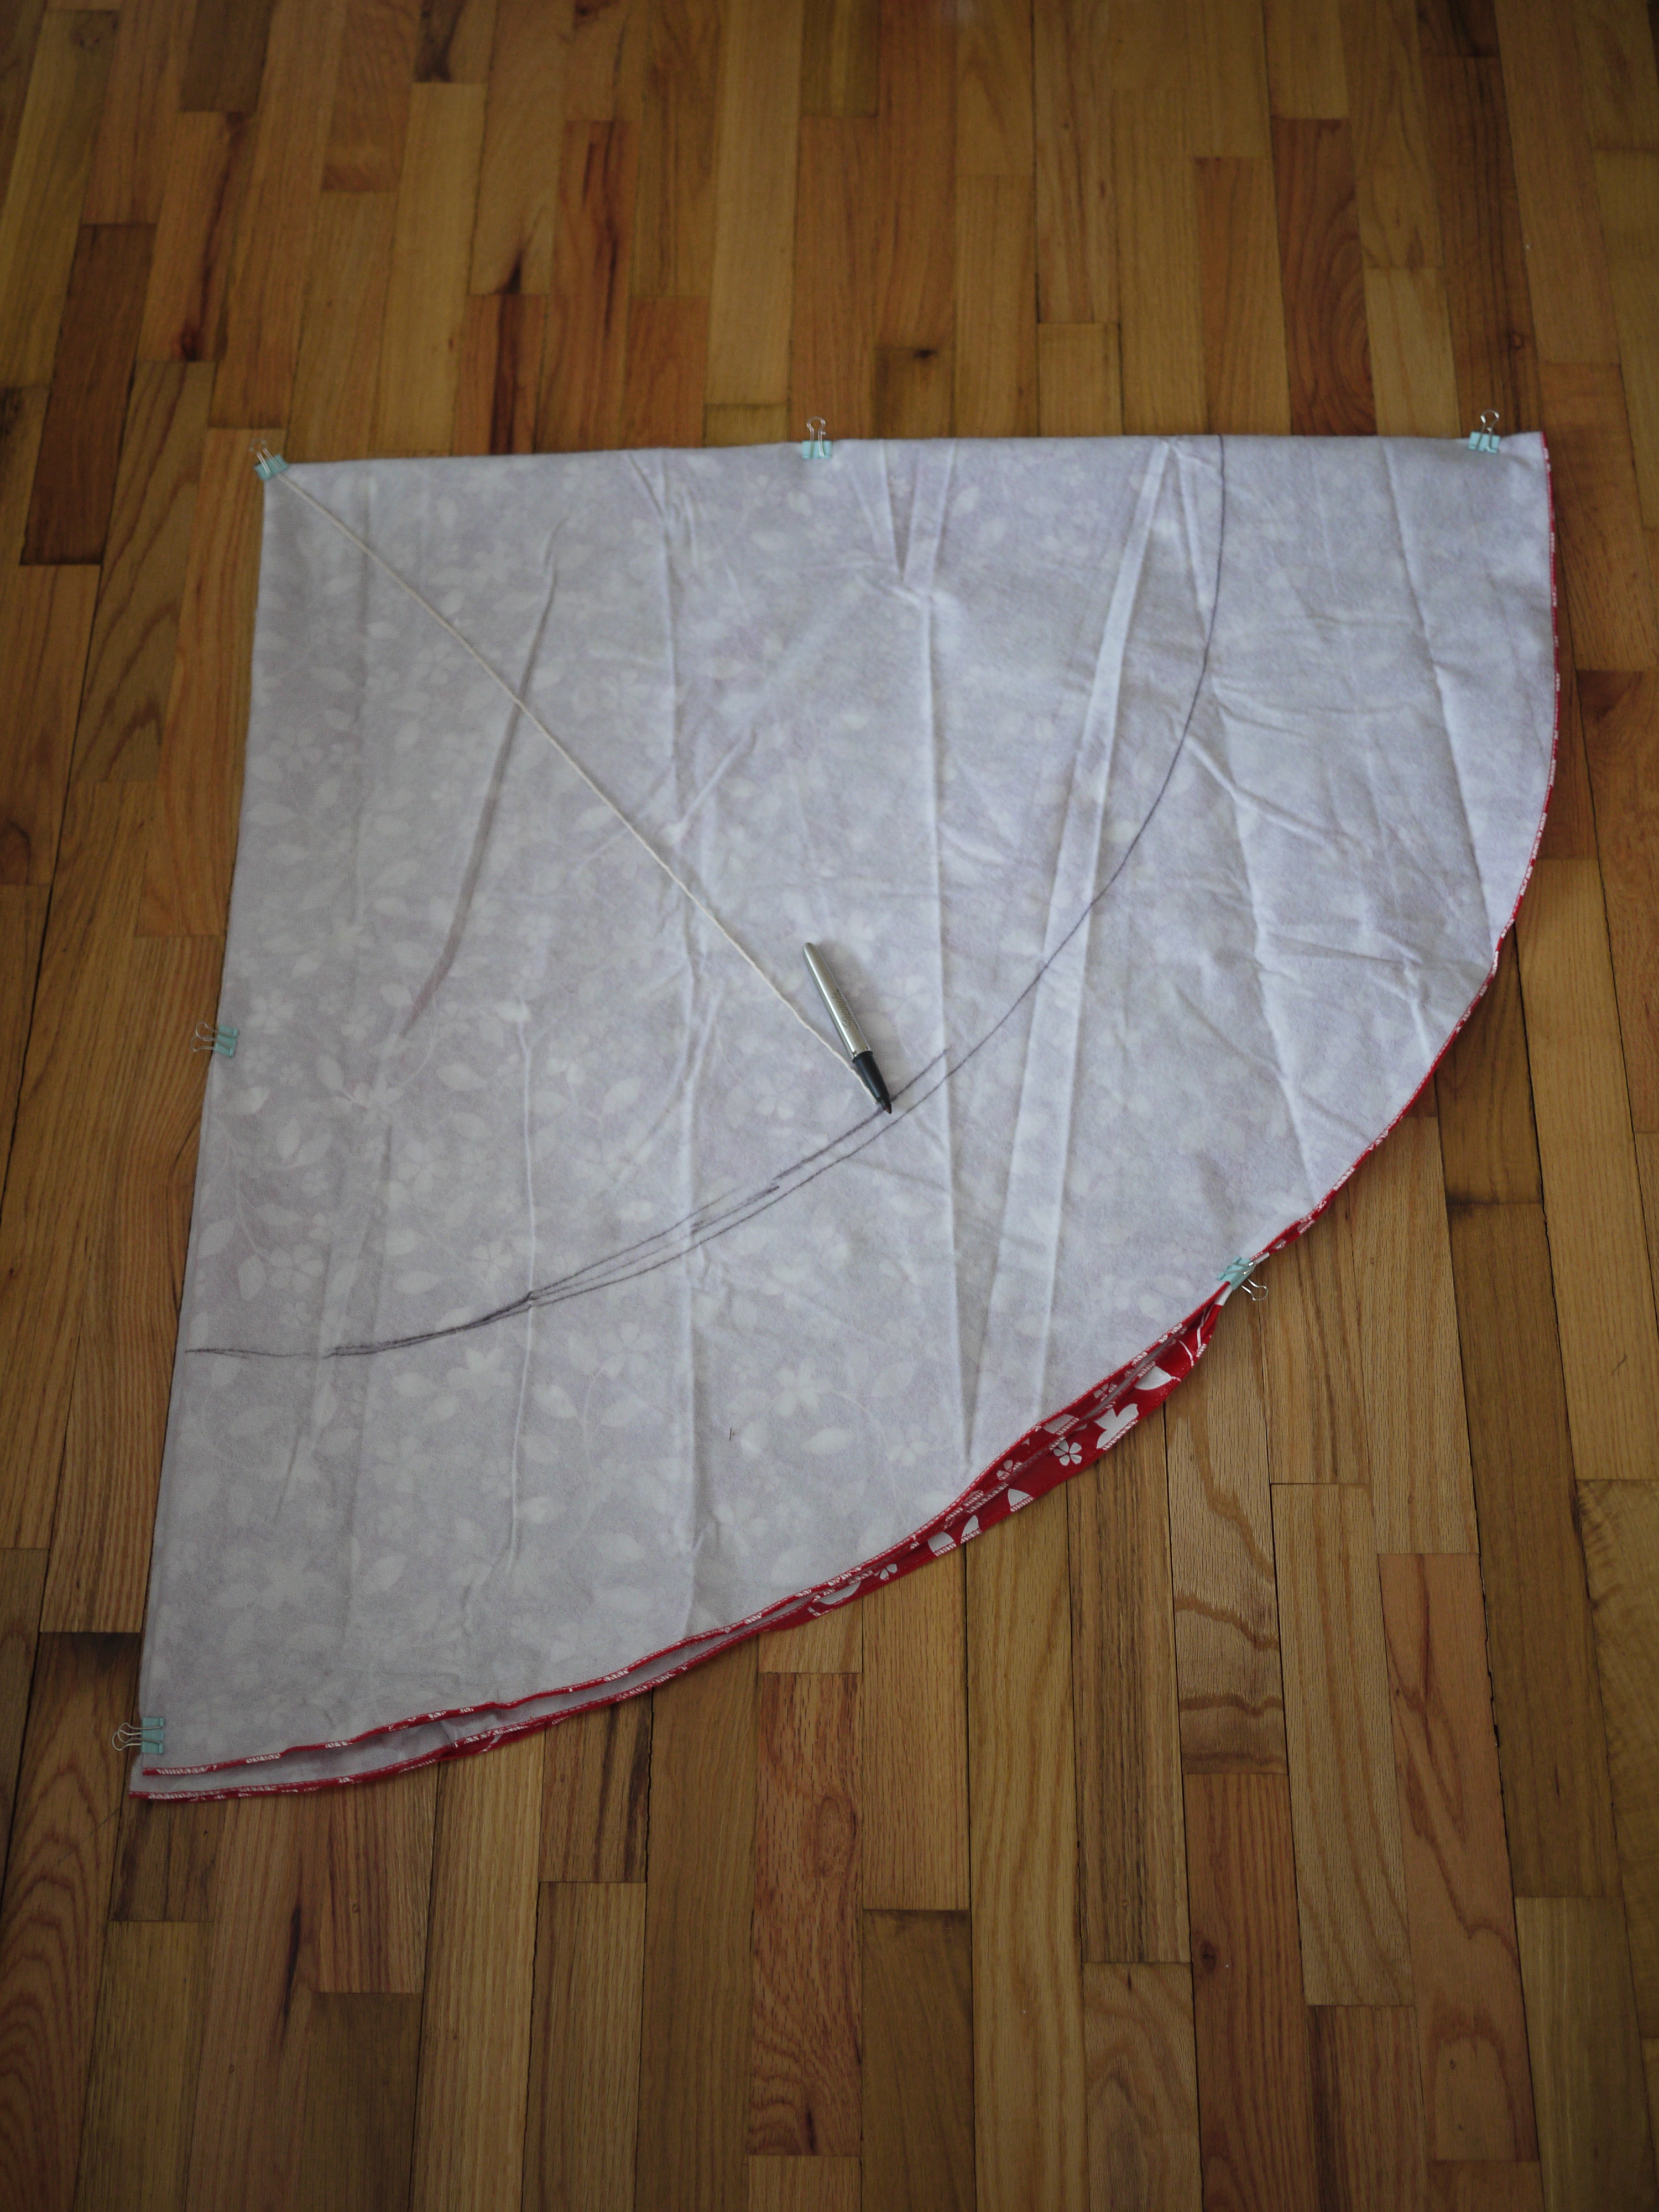
Fold the circular tablecloth into quarters. Use binder clips to keep it from shifting. Katie used these rather than pins so she wouldn’t make holes in the fabric. Clip the string to the center point of the tablecloth, the corner of the folds (at upper left in photo). With a marker or chalk, use the string as a compass to mark the size of the tabletop. Keep even tension on the string as you pull it across the tablecloth. Cut all layers along this line. You’ll end up with a smaller circle.
-
Fold the circular tablecloth into quarters. Use binder clips to keep it from shifting. I used these rather than pins so I wouldn’t make holes in the fabric — the point is for the cover to keep water and snow away from the table, after all. Clip the string to the center point of the tablecloth, the corner of the folds. With a marker or chalk, use the string as a compass to mark the size of the tabletop. Keep even tension on the string as you pull it across the tablecloth, but try not to stretch it. Cut all layers along this line. You’ll end up with a smaller circle.
-
Cut the rectangle tablecloth in half lengthwise. This worked out well for my purposes — I ended up with two rectangles 30 inches by 84 inches, which was the right height (29 inches plus 1 inch seam allowance) and just a little more than I needed for length. Here’s how to figure the length needed: Take the circumference of the table that you measured, divide it in half, and add 2 inches for seam allowance (one seam at each end). I needed two rectangles each 78 inches long. Cut rectangles to the correct length.
-
Sew the rectangles together along the short ends, right sides together. Also, your rectangles will each have one long cut edge and one long finished edge, so match those up. The finished edge with be the bottom of your cover. No hemming!
-
With right sides together, use the binder clips to attach the circle tablecloth to the rectangles along the cut edges. Once it’s all clipped together, sew it up. This was pretty awkward because of the size, fabric, and having to go around the edge of the circle, but it wasn’t hard. Just keep the extra fabric from getting under the needle.
-
Almost there! Before flipping the cover right-side out, attach weights to the inside bottom of the cover to keep it from flying away on a windy day. I used fishing weights because I assumed they’d be cheaper. The package I bought came with four, so I spaced them evenly and hand-sewed them in with thick embroidery floss.
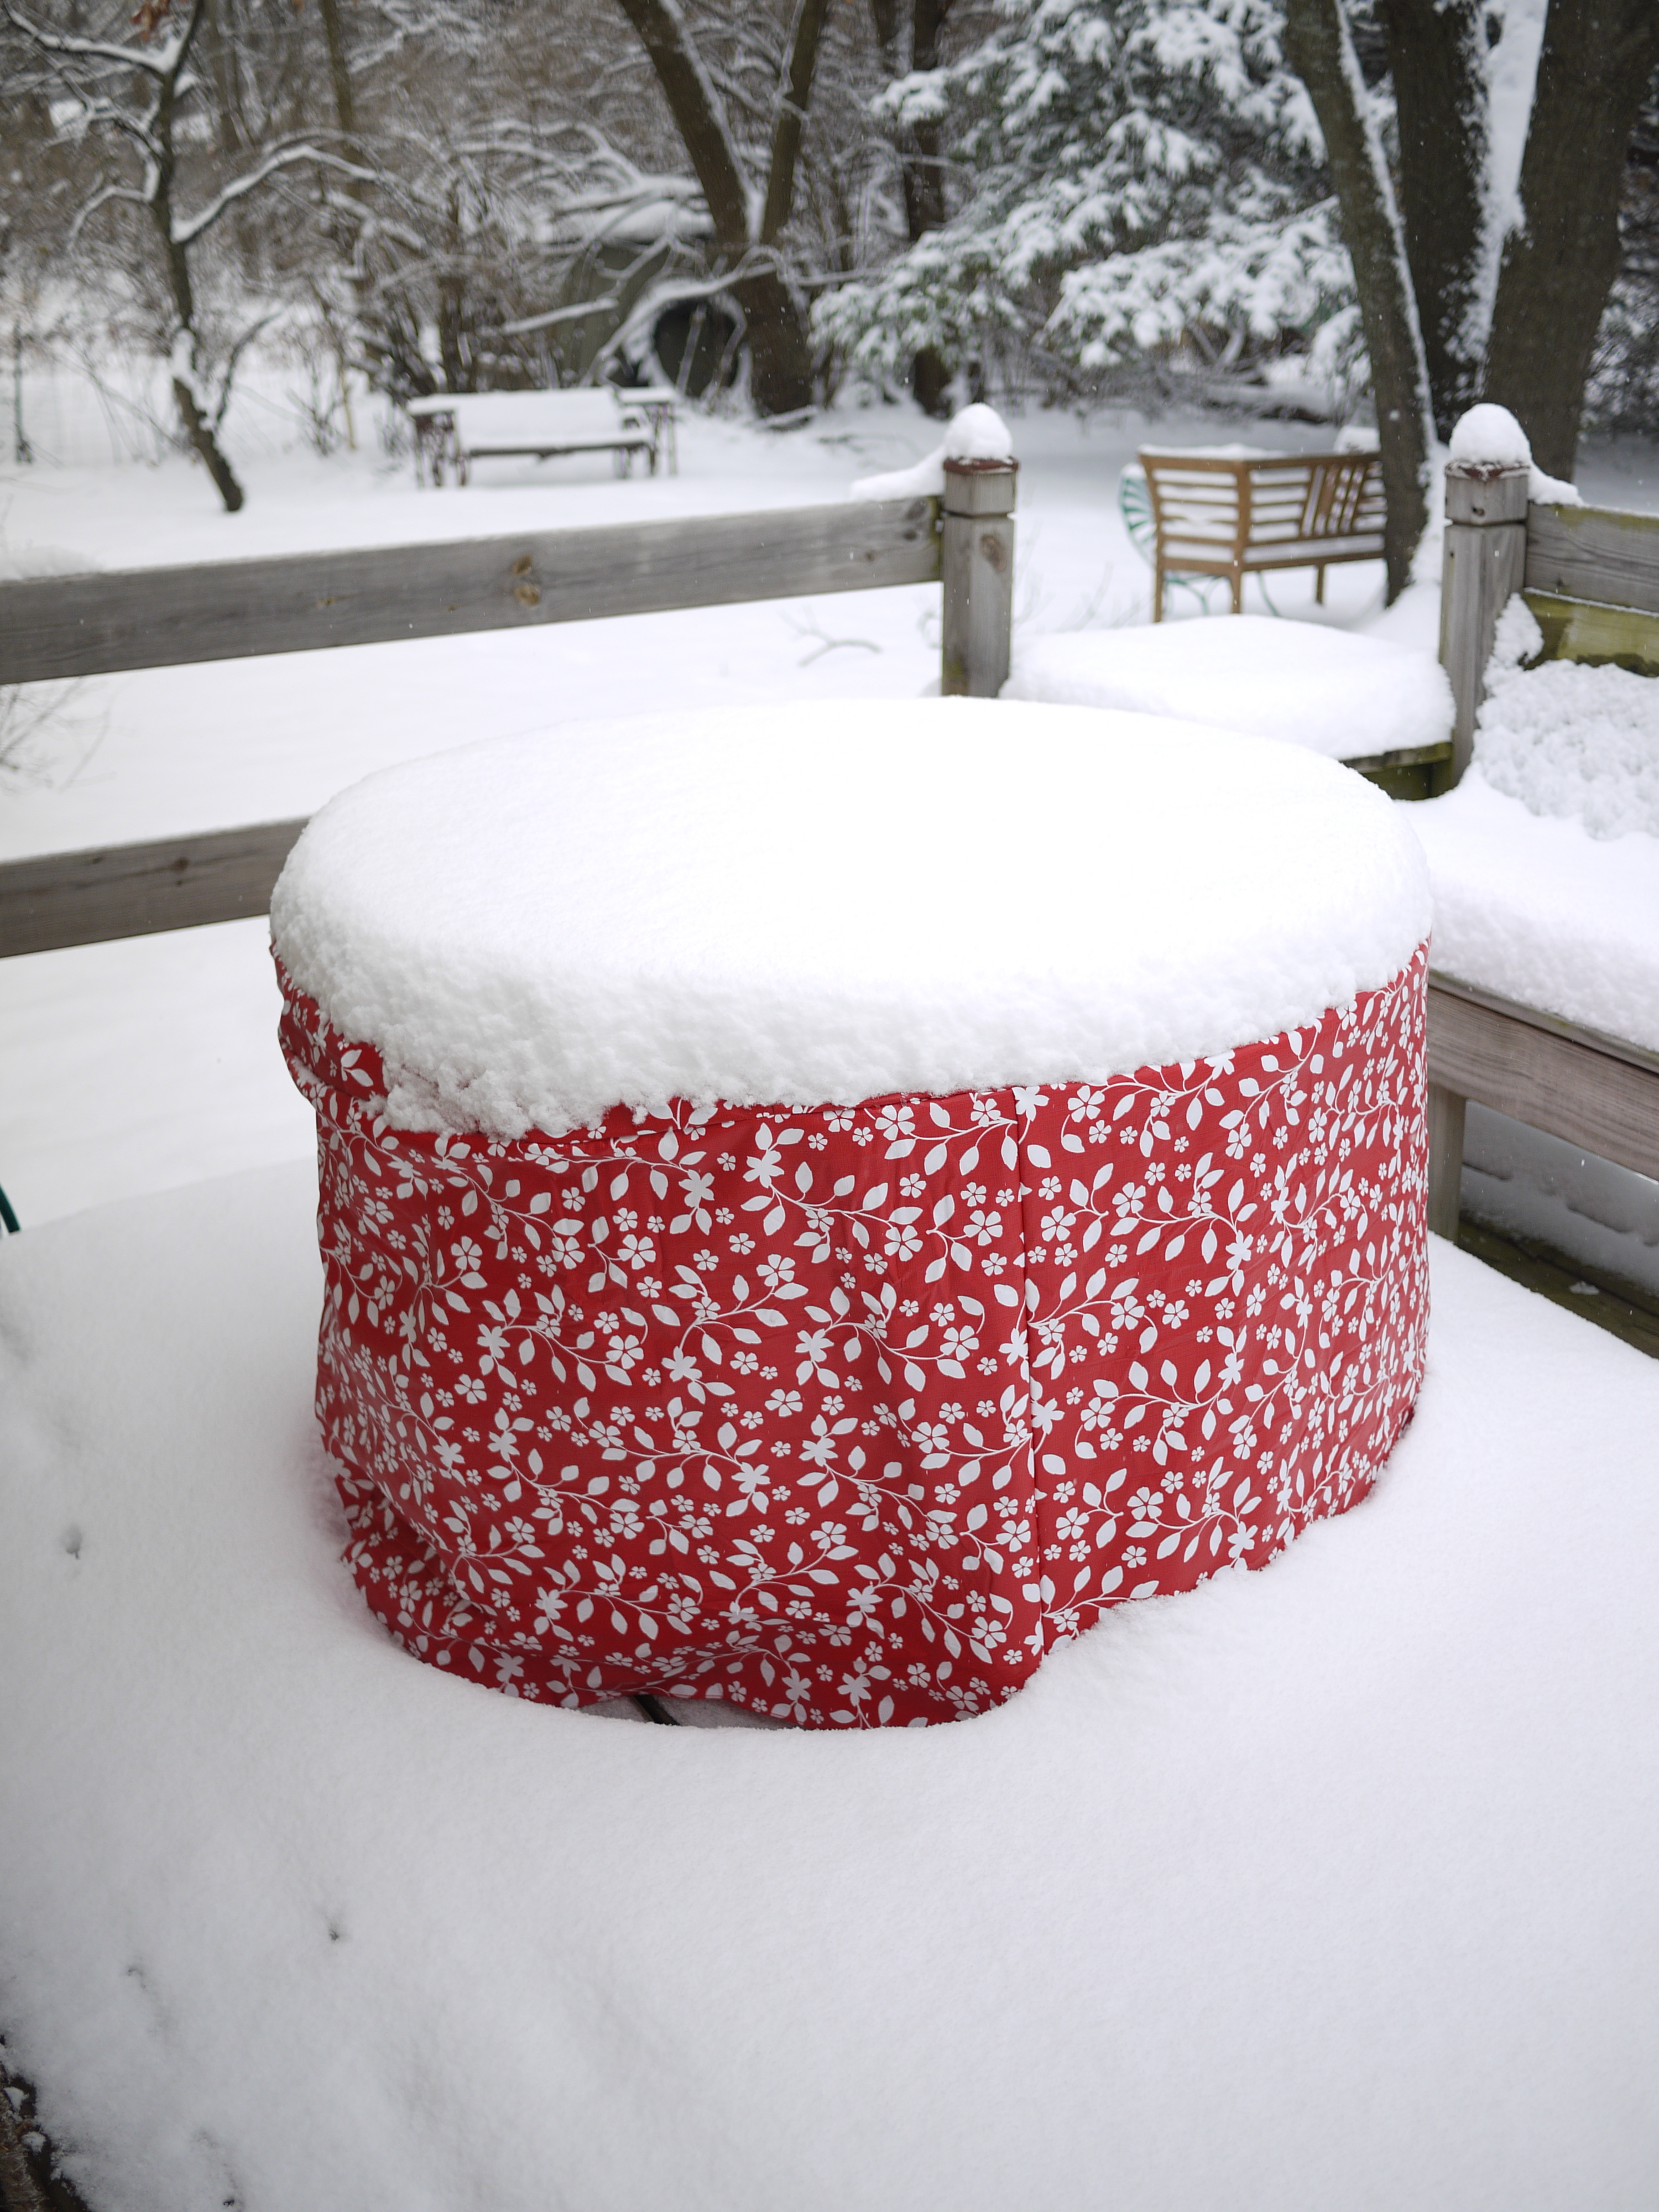
Now the cover is complete and ready to keep the elements off the table until it’s warm enough to start serving on the table.
— Katie Kritikos can be reached at kkritikos@ljworld.com.