Remnant Rehab: Trick-or-treat tote
Kids can collect Halloween candy in a cute tote bag.
When I went trick-or-treating as a kid, my mom would give me a tote bag or one of those pumpkin buckets. I always wanted to use a pillowcase — I thought the kids who had them were getting more candy because they had bigger bags. One year I went ahead and used a pillowcase. As it turned out, I got the same amount of candy, but it looked like less because the pillowcase was so big. Should have stuck with the tote bag.
In light of that childhood experience, I made a Halloween candy bag ideal for trick-or-treating — it’s festive, and not too big so it doesn’t dwarf the amount of candy.
I used — you guessed it — fabric remnants for my bag, so I based the dimensions on what I had. You can do the same, but you’ll need at least 1/3 yard for the bag and some contrasting fabric for the design.
Supplies
- Fabric
- Marking tool
- Scissors
- Paper
- Fusible interfacing
- Iron
- Ruler
- Sewing machine
- Thread
- Satin stitch foot (If you have one, the project will be less frustrating.)
- Nylon webbing or ribbon
Instructions
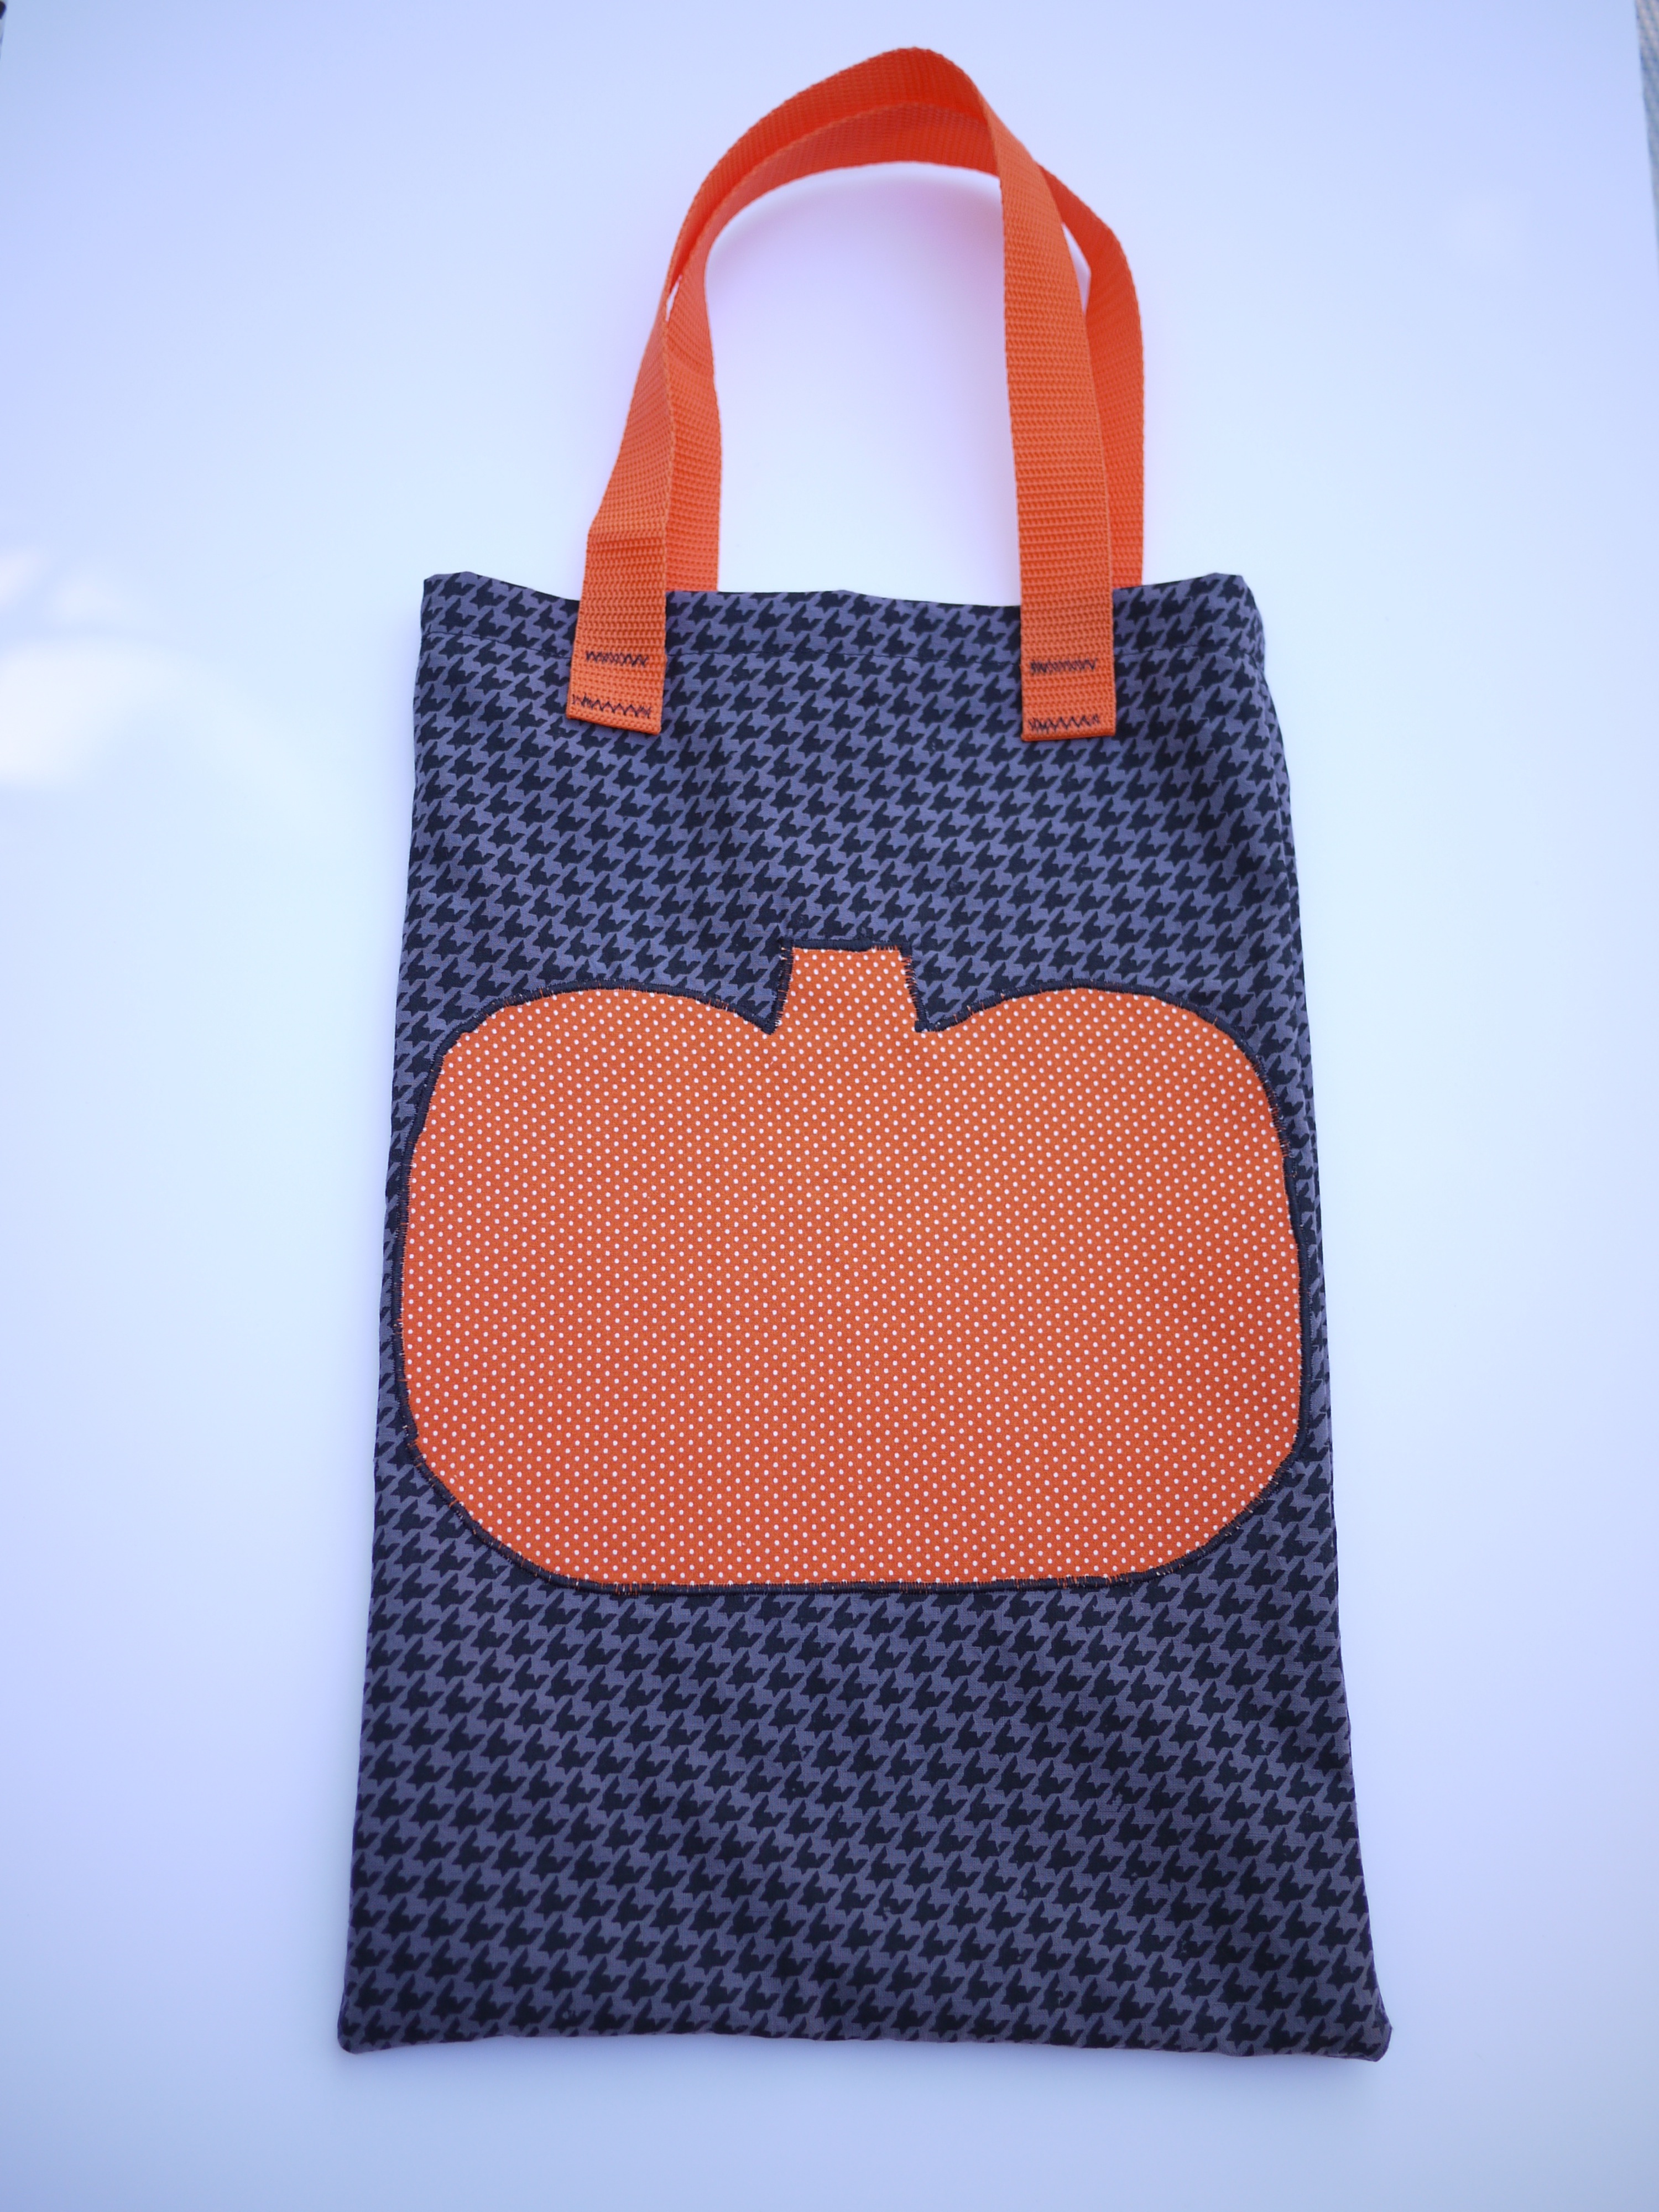
- Decide the size of your bag and cut out main fabric. Based on what I had, I cut two pieces 12 inches by 18 inches.
- Sketch your applique design on a piece of paper. I can’t draw at all, so I went with a pumpkin shape. It’s an easy one, but it still took me four tries to make one I liked. Whatever you choose, make sure it will fit on your bag.
- Fuse the interfacing to the contrasting fabric. Then trace the paper shape onto it and cut it out.
- Pin the contrasting fabric shape — the applique — to the front of the bag. You’ll sew around the edges with a satin stitch. A satin stitch is a close, wide zigzag stitch. It covers the raw edge of the applique and attaches it to the fabric. After sewing about an inch, I realized I needed to switch from my normal presser foot to a satin stitch foot, which has a channel in the back that runs over the thick stitching more easily. On my machine, I set the stitch length to near zero and the width to four. Experiment on a scrap of fabric before you start on the bag to find what works on your machine.
- Once your applique is attached, press the front piece of the bag.
- Lay the front and back pieces of the tote wrong sides together and sew a 1/2-inch seam around three sides, leaving the top open. We’re doing a French seam, so wrong sides together is correct.
- Trim the seam allowances nearly down to the stitching, but don’t cut the stitching. Flip the bag inside out and press.
- Sew a 3/8-inch seam around three sides, leaving the top open. Press.
- While the bag is still inside out, turn down the top of the bag 1/2 inch and press. Turn it down another inch and press.
- Sew the top seam about 3/4 inch from the top of the bag. Flip it right-side out.
- Cut two 20-inch pieces of the webbing or ribbon. Fold each end up 1 inch; the raw edge will face the fabric. Pin the first strap to the front of the bag. For the size of my bag, I pinned the straps on about 2 inches in from the side seams. Repeat for the strap on the back of the bag.
- Sew the straps onto the bag. You can use whatever type of stitch pattern you think will be strong — I went with two zigzags per strap, one along the bottom of the strap and another 1 inch up.
There’s only one thing left to do — trick or treat!