No need to knit to create warm winter scarf
Hello, my name is Katie, and I’m addicted to fabric remnants. I pick them up almost any time I’m in a fabric or thrift store. I just want to rescue those poor odds and ends and make them into something useful and beautiful. This flower scarf is an example.
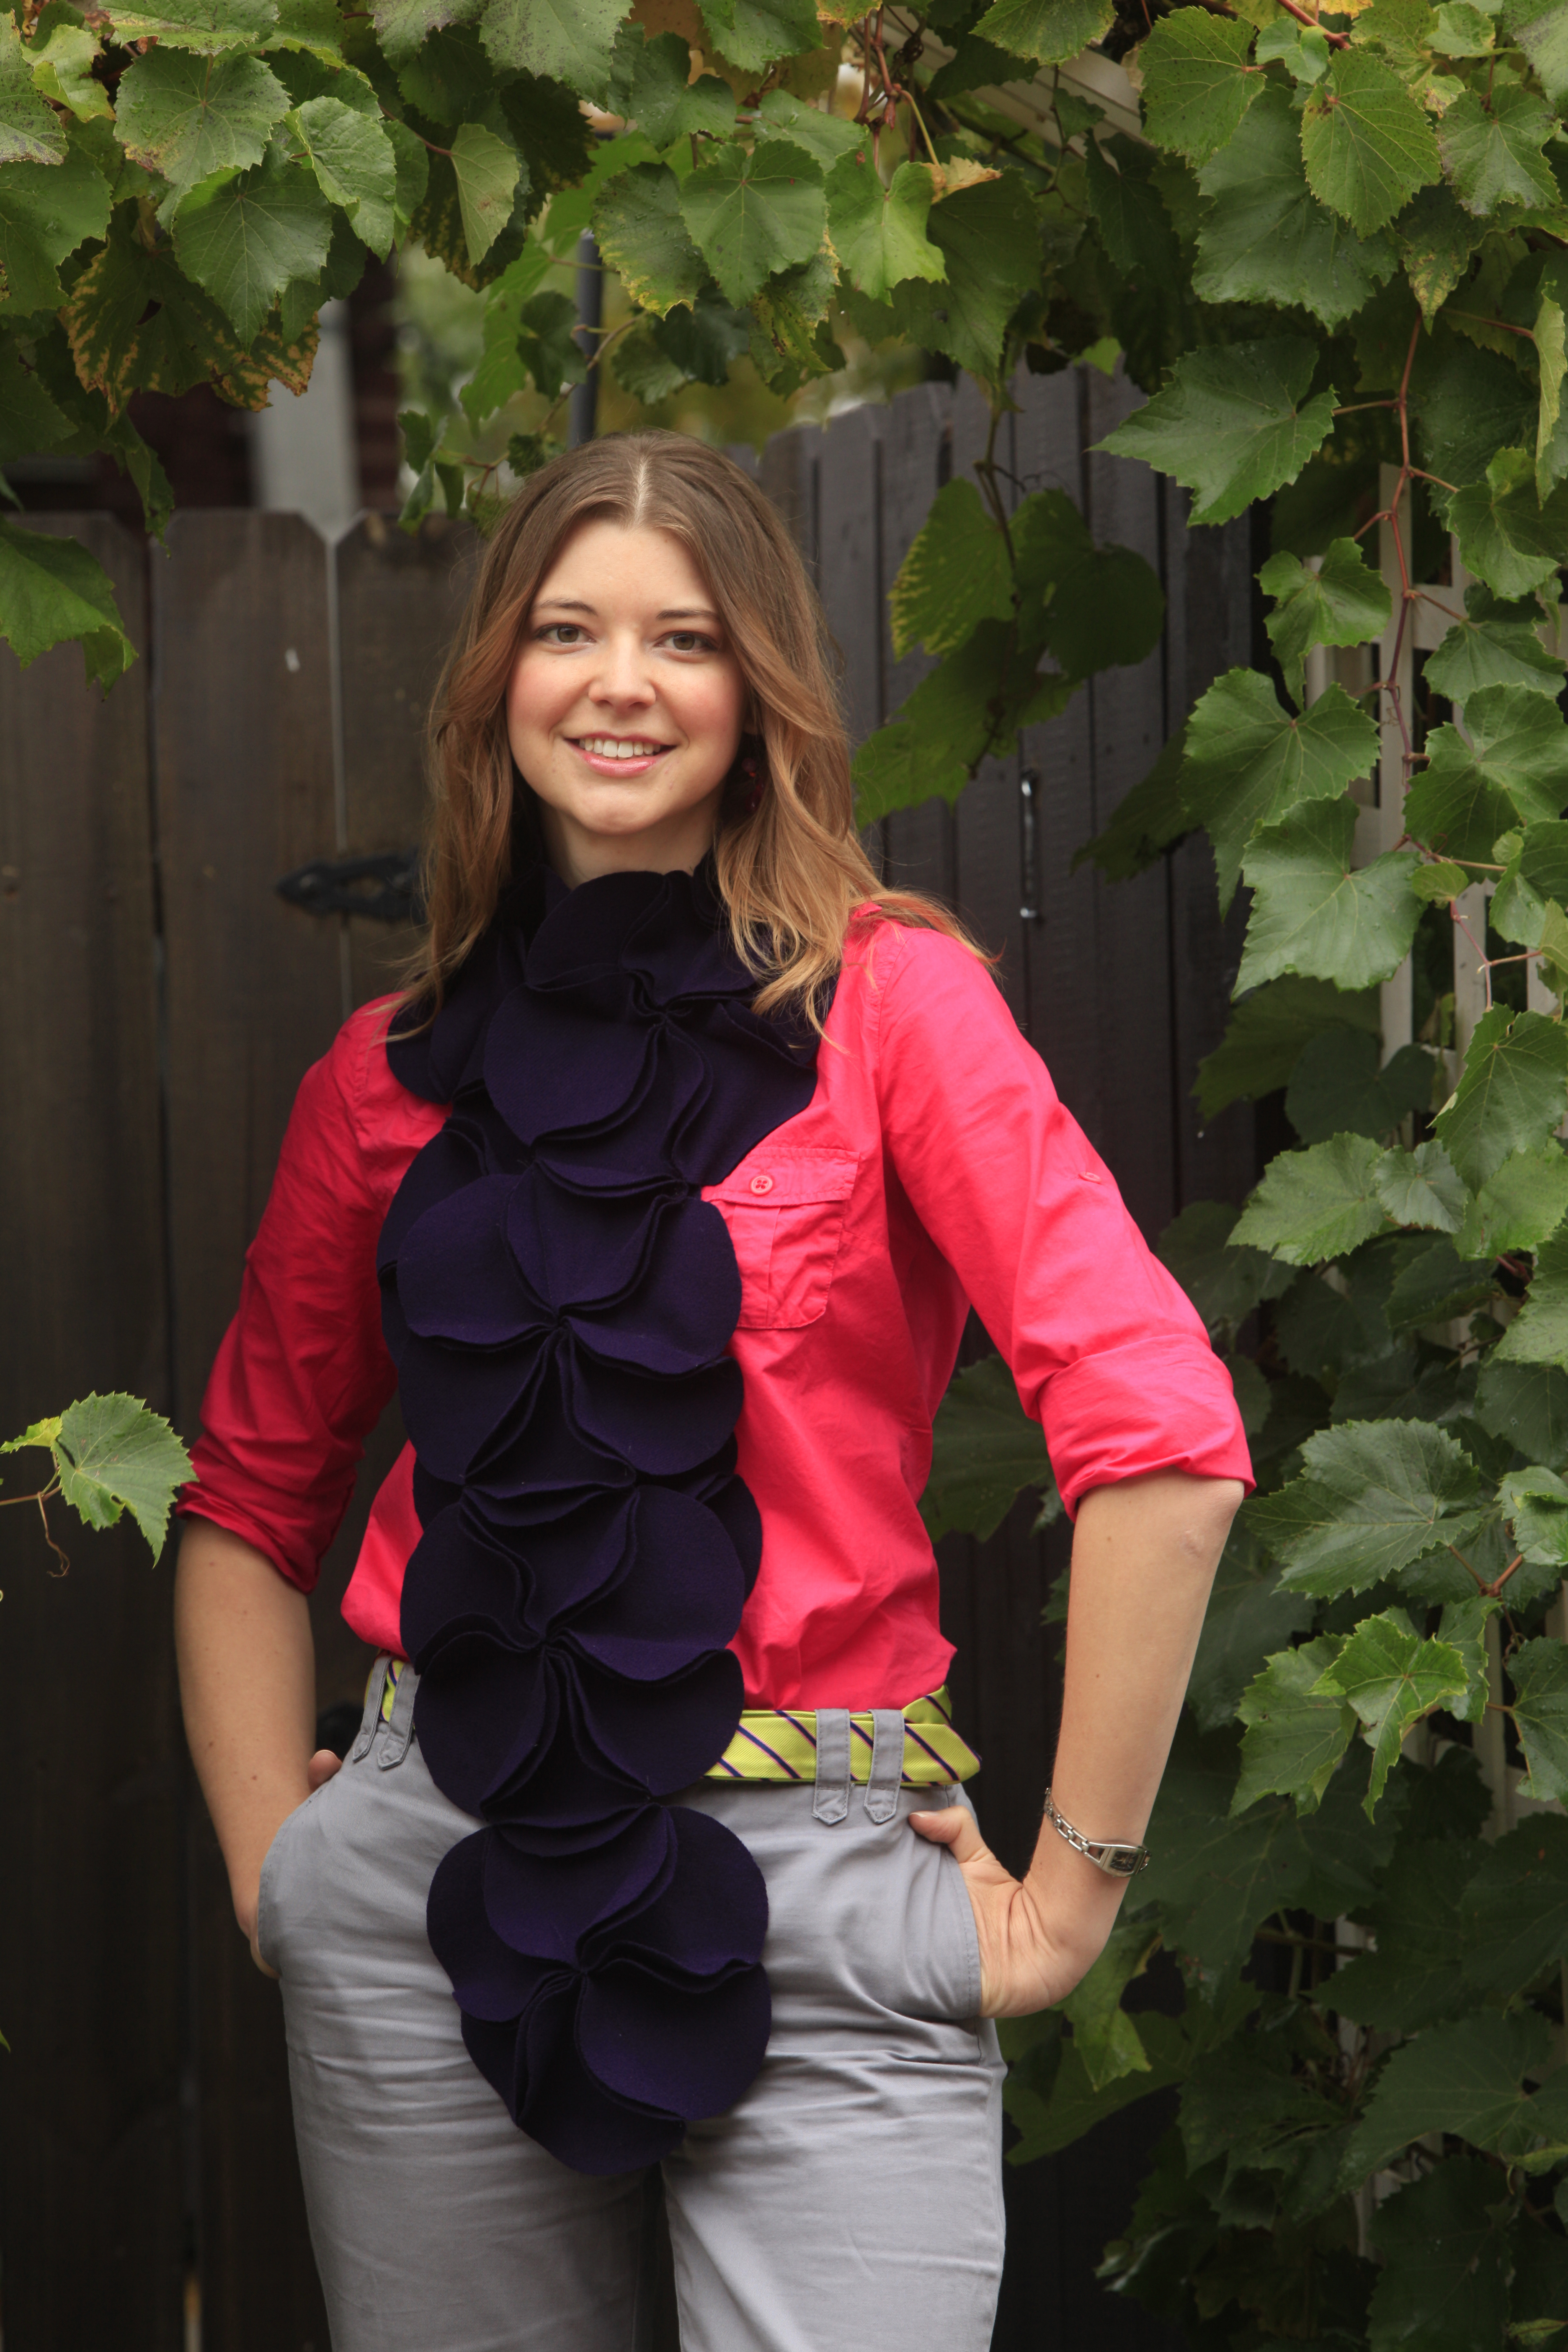
The finished geometric flower scarf.
Warning: Contains geometry!
With cooler weather coming but not settled in yet, it’s a good time to make a scarf. Boiled wool is warm, won’t fray, and doesn’t have a “right side” or “wrong side,” which makes this pattern that much less complicated.
This scarf is inspired by one I saw in a catalog. It was selling for $135; this one cost about $4 — I used fabric from the scrap bin and thread I already had on hand — and took about four hours to make.
Supplies
pencil
cardboard
drafting compass (that’s the circle-making kind, not the north-finding kind)
2/3 yard boiled wool/wool coating fabric
scissors
straight pins (optional)
tailor’s chalk
thread
sewing machine
For more photos of the scarf construction, go to remnantrehab.posterous.com
Instructions
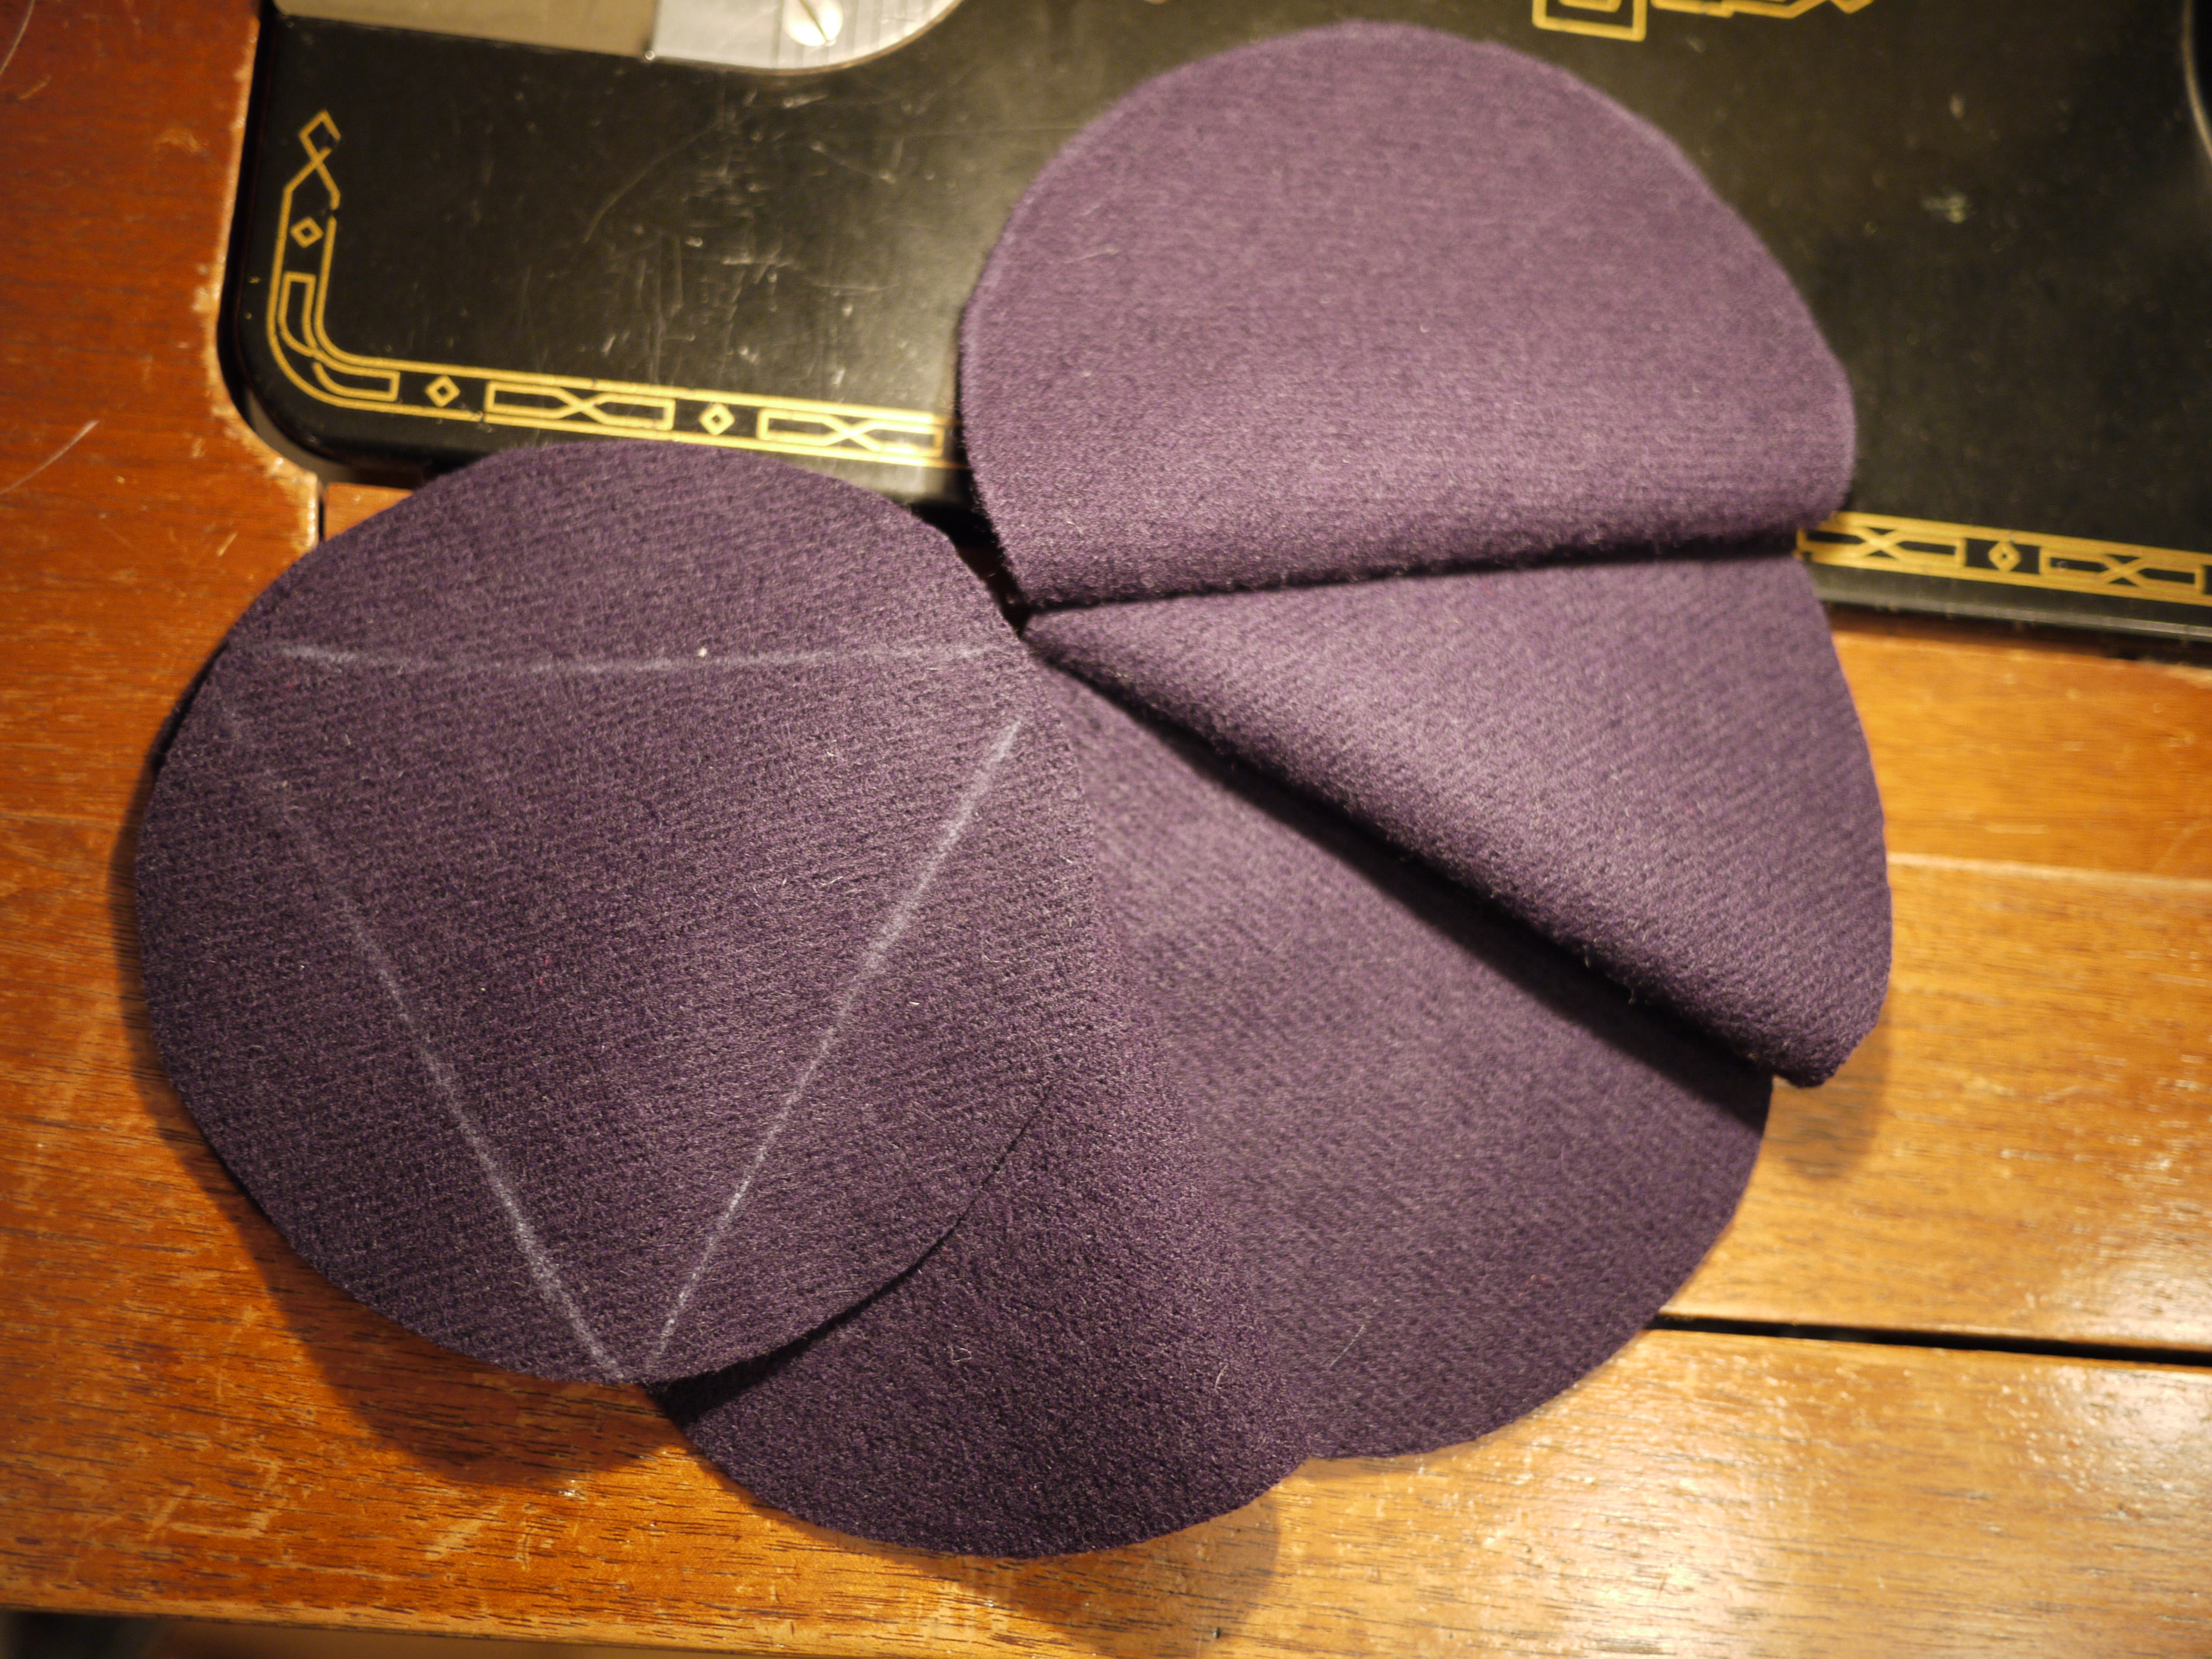
- Use compass and pencil to draw a circle on cardboard. Mine is 4.5 inches. I don’t know how I arrived at that size, but I wouldn’t go any bigger. It makes a flower about 9 inches in diameter. I wouldn’t go any larger, and if you are petite, you may want it a bit smaller — perhaps 4 inches. If you’re happy with the circle size, cut it out. Don’t change your compass setting yet.
- Make a second circle of the same size on the cardboard. Inscribe an equilateral triangle inside: Place compass point anywhere on circle. Mark with the pencil where it intersects the circle. Going clockwise, put the point on the intersections and mark where it intersects again. Keep doing this until you end up with 6 points. Connect three that make a triangle with legs of equal length. Cut out this triangle.
- Trace circle onto fabric with tailor’s chalk and cut out. You will need 48 circles. I folded my fabric so that I could cut out three circles at a time. I pinned it to keep the layers from shifting.
- Divide circles into stacks of six — you will need six circles per flower. Trace around the cardboard triangle on three circles from each stack. These are your seam lines. The markings will show, so make sure they can be rubbed or washed out.
- Assemble the flowers: Lay a marked circle on top of a plain circle. Sew along any leg of the marked triangle. Clip off excess thread as you go along.
- Align second plain circle with back of marked circle. Sew along either unsewn leg of the triangle.
- Align second marked circle to the back of either plain circle, with one angle of the triangle pointed to where the other circles meet (the center of the flower). Sew from outside to center. Take care not to catch other circles in the stitching.
- Align last plain circle with back of marked circle just sewn. Sew from outside to center along the leg that points to the meeting of the previous circles.
- Align last marked circle with back of the plain circle just sewn so that one angle of the triangle points to the center of the flower. Sew along leg from outside to center.
- For the last seam, align marked circle with the plain circle that has only one seam sewn. Sew along the leg that points to the center.
- Moment of truth — unfold and it should look like a flower with six seams pointing to the center. The side with the seams standing up is the top. Now keep it up — sew remaining stacks of circles in the same manner.
- Once all flowers have been sewn, you will link them together. Lay two flowers back to back with seams aligned. Pick one panel with a marked triangle and sew both layers across the unsewn leg. Take care not to catch other folds in the stitching.
- Align next flower back to back with one of the connected flowers. Align a marked panel on the new flower with the panel directly across from the sewn panel on the previous flower. You want to connect the flowers in a straight line.
- Repeat until all flowers are connected. Rub off chalk markings with scraps or a towel. Wear out and accept compliments graciously.
For more photos of this process, visit http://remnantrehab.posterous.com/geometric-flower-scarf.